A frequent question I see on firearm enthusiast sites is “how to mount a scope?”. That’s a very loaded question, as there are plenty of opinions on how to mount a scope correctly. I’m sharing the procedure I use, which has worked for rimfire rifles with high-magnification scopes. Along the way, I’ll offer some alternatives, and wrap it up with resources for tools and scope rings.
How To Mount A Scope
Scope mounting is done in several steps, and I’m skipping the scope and ring selection steps. Choosing a scope and rings or mount should already have been done, as those are a topic for another day. Ideally, you want the lowest rings possible to keep your scope off the rifle, but aligned with your eye when you have a proper cheek weld on your stock. From there, the first step is to mount the rings or one-piece mount. After that, position and level the scope. Then carefully torque your rings (or mount). The final step is to zero the scope.
Tools Suggested
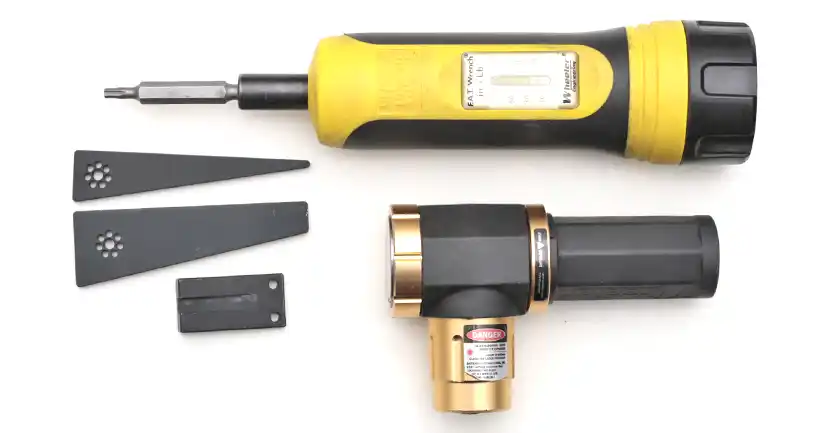
Start with quality tools. Cheap bits in your driver will fit sloppy and can strip the screw heads. A quality bit set isn’t too expensive and will include hollow ground bits for other gunsmith work. A torque wrench is always recommended for driving those bits. I use the Wheeler F.A.T. (Firearm Accurizing Torque) wrench. Torque specs for optics are in inch-pounds, which is a surprisingly small amount. Overtightening will easily ruin optics. Do not use thread-lock on your rings either. That will cause the actual torque to be higher, and it’s not necessary.
Levels or a plumb are tools for making sure your reticle is level. If it’s not, adjusting windage and elevation will be difficult, since your changes will be diagonal, rather than horizontal or vertical. Zeroing a scope can be done several ways, and I have found the magnetic laser to be the quickest and easiest way. The Wheeler Professional Laser Bore Sighter is available in red or green. They’re available from a wide variety of retailers, and I bought both of mine used from private parties for well under MSRP. They’re a good investment.
Mounting Scope Rings
If you have a one-piece base, you don’t have any options here, you just torque down your base to the recommended specs. Rings give you more flexibility, as they can be moved fore and aft on your rail. Generally, you want them as far apart as possible on the scope body. Avoid getting too close to the objective (front) where the scope body widens. Likewise, make sure you have room around the turrets and magnification ring or ocular (rear) lens. You’ll want some room for adjusting the scope forward and back for proper eye relief.
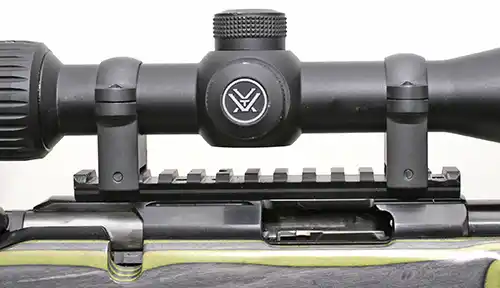
Once the ring locations are determined, tighten them down. When I first learned how to mount a scope (for centerfire), I always pushed the rings forward against the rail. For rimfire applications where recoil is not an issue, this isn’t necessary. If the rings have a single cross-bolt, tighten it fully all at once. If there are two or more per ring, do not snug one all the way down, and then do the other. Instead, alternate back and forth so they are tightened down equally.
Placing Your Scope For Proper Eye Relief
All scopes have a set distance where you can see the full image without any dark edges. Making sure that your scope is not set too close or too far away ensures the optimum image. After placing it in the rings or mount, add the top half of the rings (or mount) and tighten them just enough so that the scope doesn’t move easily. Find the middle of your magnification range, and bring the scope to your natural shooting position. That could mean shouldering it, or getting behind it as though you were shooting off a bench.
Slide the scope back and forth until you find the center of the range where the image is clear, without dark edges. Carefully adjust the magnification to the highest point, and verify that the image still has no shadowing. If it all looks good, make sure you don’t move it from this position, then move on to the next step.
Leveling Your Scope
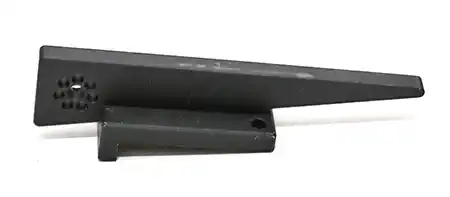
One of the most critical steps for accuracy in learning how to mount a scope is leveling. This process can be as complex or as simple as you make it. Some folks attach a bubble level to the barrel to level the rifle. Then they place another bubble level on the scope turret. When both are level, the scope is level. I prefer using a sliding wedge under the scope. The flat part of the wedge contacts the flat part of the scope where the turrets are housed. A quick wiggle of the scope while pushing on the wedge, and the scope should be level.
If you’re able to verify that your rifle is level, it’s possible to use a weighted string to level your scope. A heavy brass plumb bob used in construction is ideal, but any fine string with enough weight will work. When suspended from the ceiling (or a rafter in your garage), simply line up your reticle with it. This option requires some space, but it’s also relatively inexpensive. Another option is to use a quality construction level to mark a wall with a level line. I haven’t done that, but apparently some people do.

Tightening the Scope Rings or Scope Mount Upper Halves
You’re reading this because you want to learn how to mount a scope properly. And this is another critical step that affects accuracy as well as your scope itself. If you overtighten your scope rings, you may find that your scope does not track well, or it won’t hold zero. Crimp marks in a scope body are signs of overtightening, and it’s probably the number one cause of “accuracy issues”. Most rings suggest 15-18 in-lbs. That’s inch pounds, not foot pounds. No need for gorilla strength, it’s actually not much more than “finger tight” for most people.
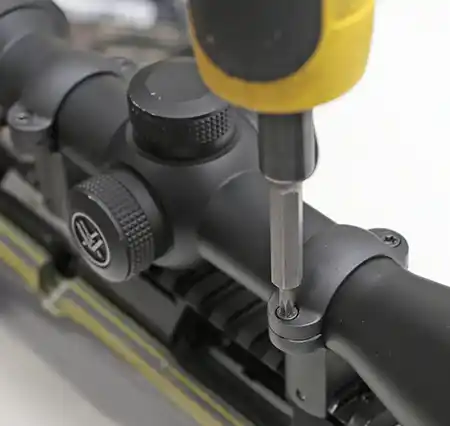
Buy or borrow a torque wrench rated in inch pounds. My Wheeler is nice, because it’s compact and takes driver bits. A decent 1/4″ beam type will offer the same or better accuracy for much less money. If you buy one, you can loan it to friends. When borrowing, there should probably be pizza or tacos involved. However you get your hands on one, get one. Set the torque per the manufacturer, and tighten the screws a little bit at a time.
I start at either ring, do one screw, then go diagonally across. Then I do the other ring in the same pattern before going back to the first ring. Yes, the rings shown are not the best example. Whether each ring has two, four, or six screws, the goal is to torque all screws equally with even gaps in the rings, regardless of the pattern. Once the correct torque is hit, go back and check them all again. Check the level once more before moving on to zero.
How to Zero Your Scope
Now that you know how to mount a scope, it’s time to zero it. You could just take it to the range, shoot some rounds, and then adjust it until your point of impact matches your point of aim. I prefer to get it as close as possible before leaving the house, so I can spend my time shooting, not tinkering. If you have a bolt action, you can pull the bolt, peek through the barrel at a spot on a distant wall, and then adjust your scope to that spot. It’s rough, but will get you close. There’s also a way to work out the math between bore and scope height, but I’m not a fan of math.
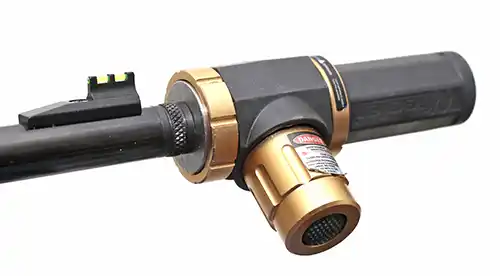
My system uses a magnetic laser on the end of the barrel. I attach the laser and project it on a wall about 25 yards away. I’m more concerned with windage at this point, but try to get my elevation set too. By setting up my scope to be about an inch low at 25 yards, I’m usually very close at 50, and only minor adjustments are necessary. If I had exactly 50 yards to use as a reference, the laser method would be much more accurate. Depending on the rifle and ammo, it takes less than a magazine full before I’m hitting a 1/2″ target at 50 yards.
Recap: How to Mount a Scope
This isn’t rocket science, it just requires a bit of patience and the correct tools. If you care about accuracy, don’t pay someone else to do this for you. Learn how to mount a scope yourself, and you’ll be ahead of the game. Proper torque, level, and eye relief is really all there is to it. In addition to the tools, start with a good set of rings from a reputable brand.
Below are some resources for rings and tools. Note that we have partnered with MidwayUSA, as they have nearly everything you could need, and excellent prices.
MidwayUSA has Wheeler F.A.T. Wrench kits, as well as the tool by itself, at really good prices.
*Buy the lastest version of the F.A.T. Wrench direct from Wheeler.
*Red or Green Magnetic Lasers from Wheeler.
*Some users have reported that if you create an account for the Wheeler site, view some products and then leave the site, you get a 20% off coupon via email shortly after. That’s a better deal than buying from Amazon.
Questions? Comments? Anyone have other tips to share?