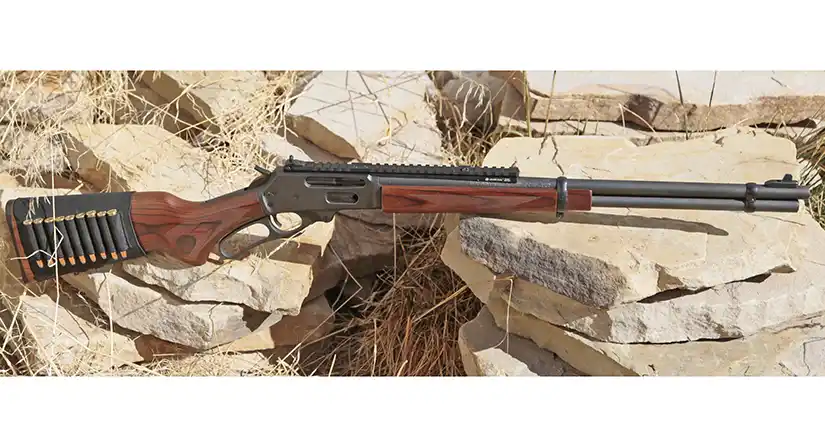
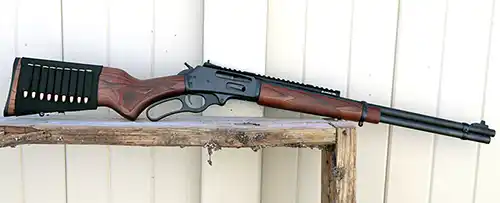
Fitting the XS Sights Ghost Ring Sight Set and Lever Rail to my Marlin 336 was a smart upgrade to this rifle. The more I use aftermarket iron sights, the more spoiled I get. Most offer a longer sight radius for improved accuracy, which I can definitely benefit from. This kit, with the Ghost Ring and White Stripe set, is a big step up over the factory sights. And that extra long rail leaves plenty of room for the scope that I’ll probably add later when the reality of my declining vision sets in.
XS Sights offers two different Ghost Ring sight sets for Marlin lever actions. They also have an excellent optic mount that seems to be the go-to for most lever action owners. While I would have been content with just the sights, the reality is that I will probably need a scope for longer shots. My eyes are not getting any younger. So I got the full kit with the Lever Rail and sights, and figured I’d see how well I do with irons first.
Marlin Optic Mounts and Ghost Ring Sight Sets from XS Sights
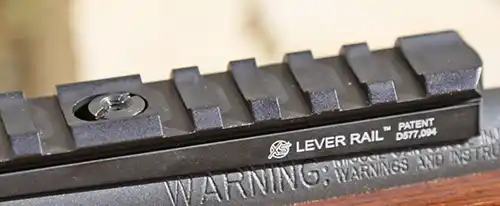
This kit pairs the steel rear Ghost Ring sight with a steel front blade sporting a white stripe. Between them is the eleven-inch aluminum Lever Rail that the rear sight fits into. Although that may seem like a long rail, it’s that length for good reasons. First, the front mounting point is where the original rear site was located. And it has some added slots in front of that. Second, a scout-style scope with long eye relief is a popular option for lever actions. So having the long rail provides the option of a forward-mounted scope.
Installation of the rear site and Lever Rail combination
XS Sights is known for making its products accessible to home gunsmiths. No special tools are needed to install this kit. After removing the sight bases that were on my rifle, I drifted out the rear sight. That left four screw holes in the receiver, and an ugly dovetail in the barrel. I carefully pushed the little pillar into that dovetail, installed the pillar jack screw, and then placed the Lever Rail over it. Then I installed the screws through the rail and into the receiver.
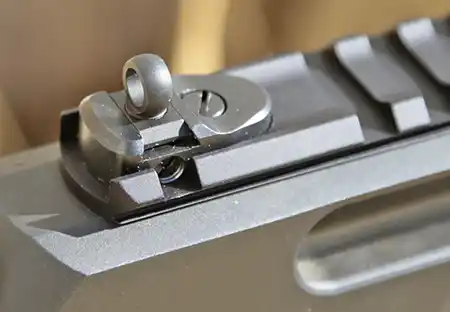
Once I was certain that they all lined up, I added the slotted pillar nut and tightened it all down. The rear sight itself mounts with a single screw through the Lever Rail. At this point, it all looked good. So I undid everything, then grabbed the included thread locker and started over. A drop on each screw is all it takes to keep them from backing out. That, and 15-18 inch lbs of torque. This is a good time to mention that a torque wrench is invaluable for working on firearms. Especially when it comes to mounting expensive optics and accessories.
Installation of the front sight
As my rifle had the integral base front sight, there was no need to mess with a dovetail. I just unscrewed the sight and tossed it in a bag with the rear sight. Even with the integral base sights, there are variations. Some use a single screw, others use two. Mine mounts with a single rear screw, but the sight is drilled for a front one too. XS Sights provides an elegant solution to this. They include a small plug screw with a smooth top. It’s threaded in from the top, but tightened from the underside. The result is a hole filled with a smooth-capped screw.
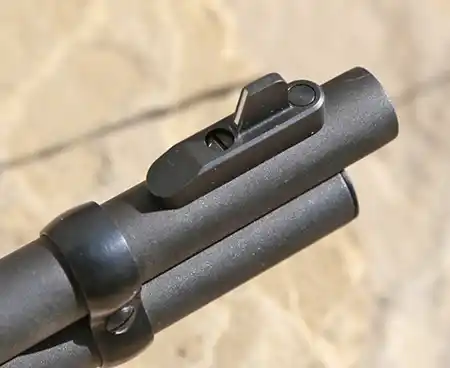
XS Sights mentions the option of having a gunsmith tap and thread the barrel for a front screw. After consideration, I decided to stick with the plug, keeping this job simple and within my budget. What helped with this decision was that the instructions call for thread locker not just on the threads, but some on the sight base too. That usually keeps things in place quite well. And this time, it calls for just 12-15 inch lbs of torque. Use a light touch so no threads get stripped.
How to zero the XS Sights for your lever action rifle
If a picture is worth a thousand words, then this very short video will save me a lot of typing. Basically, it’s a simple matter of loosening the screw in the base of the rear sight. Rotating the sight up or down changes the elevation, and it can be drifted left or right for windage.
**
**
Range time
After setting the zero at about 25 yards, I made sure that I could hit a six-inch target at 100 yards. I’ve got a variety of .30-30 ammo in different weights, and may need to spend some time fine-tuning my sights. Smacking steel at 100 yards using only irons is a bit of a challenge, even with my prescription glasses. Yet I can already shoot this rifle much better with the XS Sights than I did with the factory sights. Accuracy potential is greatly improved when extending the sight radius from approximately 16 inches to a bit more than 22 inches.
Using the Ghost Ring in conjunction with the white stripe of the front sight is both fast and intuitive. As someone who shoots thousands of rounds of rimfire each year, hearing a heavy centerfire round strike a steel gong is quite satisfying also. And then I remember that it’s at least $1 per round, and my enthusiasm gets a reality check.
Conclusion
Like a good shotgun, I think everyone should have a reliable centerfire rifle. And this Marlin 336 fits the bill for me. It’s got a classic look, and has a few features I prefer over a semi-auto. No magazines to keep track of, plus easy reloads via the side gate are great. And I already have muscle memory for working a lever after so much time with my rimfire lever actions. Adding this Lever Rail and sights simply adds to the utility of an already great firearm.
If you’re interested in a similar upgrade, XS Sights sells their Marlin Ghost Ring Sights or DRC Winged Ghost Ring Sights for $109.99 (sights only). The Optics Mount (Lever Rail) is $76.99, and the kit with both is $164.99. Find them all and plenty of other great sight options on the XS Sights website.
As always, I’d like to thank XS Sights for sending their Marlin Ghost Ring Sight set, and Lever Rail for my testing and evaluation. They make quality products in the great state of Texas, and back their products with a solid warranty.
Have any of our readers set up their lever action with the Lever Rail and/or the Ghost Ring Sights? What do you think of them?
