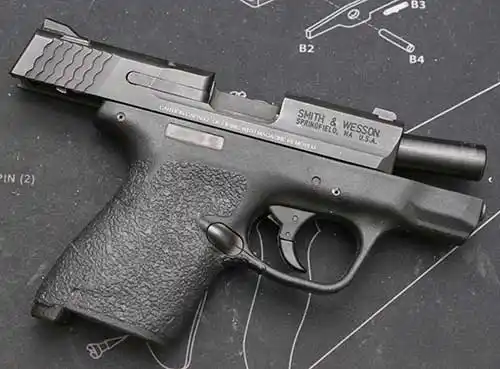
One of my favorite carry pistols got an upgrade with the XS Sights F8 Night Sights. It’s my Smith and Wesson M&P Shield 9mm. I’ve had mine for at least six years now, and it has served me well, with zero issues. I couldn’t begin to guess how many rounds I have put through it during that time, I just know I’m confident in its application as a carry pistol. Its low capacity of ten rounds (with MagGuts upgrade) might not compare well with more modern pistols, but I don’t see that as a handicap. If there is one drawback, it’s that my eyes aren’t getting any better as I get older. So it was time for a sight upgrade.
XS Sights F8 Night Sights
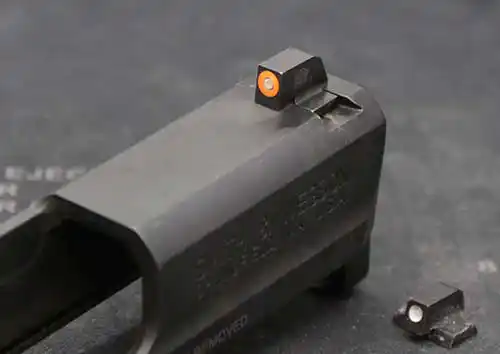
This set of sights pairs a huge orange and tritium front dot with a smaller tritium rear dot, making them really easy to use. The orange is XS Sight’s proprietary Glow Dot, made with some photoluminescent material. It’s the stuff that absorbs ambient light and glows for a bit after exposure. Combined with the tritium in the center, it’s highly visible from bright light to low light. Rather than lining up a front dot and two rears, it’s just a matter of stacking the dots. As an added bonus, the rear sight includes a ledge, making it easy to rack the slide on a belt or other firm object with a right angle. I guess I’m modernizing this old pistol.
Both sights are CNC machined from steel, and include a ten year warranty plus a 30 day satisfaction guarantee. Like most other XS Sights, they are designed to be installed at home with a sight pusher or a hammer and punch. And they’re made in Texas, one of the most American of all American states. So you can feel good about buying them, and supporting an awesome team of hard-working individuals.
About the S&W M&P Shield
The M&P series of pistols have been very popular since their introduction in 2005. They’re now a broad line that includes calibers from .22 LR up to 10mm. Yet even the latest models with an MSRP of double what I paid for mine still have basic three-dot sights. So this upgrade makes sense to me, as buying a new pistol might get me more capacity, but not necessarily better sights. And again, being able to hit my target is more critical than having a few extra rounds.
Front sight installation
Although the XS Sights F8 Night Sights can easily be installed without any special tools, removing OEM sights isn’t always easy. I’ve ended up destroying some factory sights while uninstalling them. This was a little smoother than others though. I tapped it out with a punch, and no damage to my slide. After thoroughly cleaning the front dovetail, I got to work on fitting the sight. As expected, it took a fair amount of passes across a fine, flat file to get it to fit.
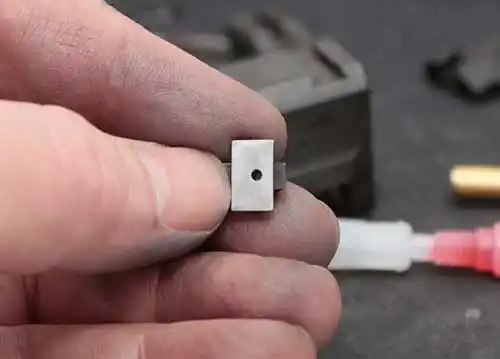
Once it goes into the dovetail about halfway, it can be tapped in with a punch. But before I did that, I coated the sight and the dovetail with the red thread locker included with the sights. After tapping it in place, I let the thread locker dry for at least ten minutes, and carefully cleaned off the excess with a cotton swab. This is not my first XS Sights rodeo.
Rear sight installation
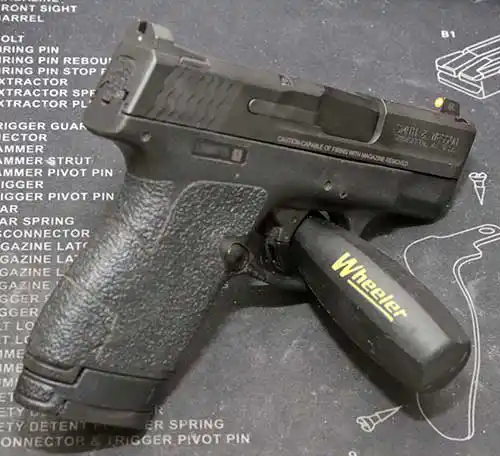
I swap sights often enough to justify the cost of a used sight pusher, and I was glad I had one for this project. That rear sight didn’t want to come out easily. This could have been accomplished with a punch, but my workbench wasn’t made for hammering, and I’m not made of patience. At one point, I covered the sight pusher with a rag, as I was certain something was going to shatter. But it came out, although quite reluctantly. To my surprise, there is a spring and a little cover under the sight. This didn’t complicate sight removal, but definitely requires care during the installation. Like the front sight, I made sure the rear dovetail was thoroughly cleaned and then got to work with my file.
While I only did a few passes on the file between each test fit, it did seem like it was taking longer than usual to fit the rear sight. Once I got it to that point where it went in half way, I was ready to tap it home. Before that, I installed the spring and its cover. The key here is to make sure the sight goes in far enough to hold that cover down first. Otherwise, this job would require three hands. With the sight tapped in place, I set the center screw and applied the red thread locker to both sides, letting it seep under. And then followed the usual cleaning instructions. Note that both sights should get a light coat of oil, especially if your firearms are prone to rust.
Adjustments
It’s possible to check the zero of the XS Sights F8 Night Sights before using the thread locker. Or they can be pushed or tapped with a punch later, if adjustments are needed. In my case, I’ll just bring my sight pusher with me next time I shoot it. If my zero is off, I can make a quick adjustment. And then give it a little more thread locker. Red thread locker on actual threads is considered functionally permanent. Yet when used to mate two flat surfaces, it’s a bit more forgiving. But don’t skip it, or the sights will eventually work their way loose.

Check the prices of XS Sights at Opticsplanet.com
Check the prices of XS Sights at Amazon.com
The end results
At $122.99, the XS Sights F8 Night Sights cost about half what I paid for my Shield. Of course, it was on sale and included a rebate from S&W. But they are a very worthwhile upgrade, since this was my one and only complaint about the pistol. It still fits in the same holsters, as expected. The only difference is that now my sights are more visible in all lighting conditions. I can pick up the front sight quickly, and the overall sight picture is definitely improved. And that’s what matters most. If you have the same model, or even a newer version, these are worthy of consideration.
As always, I’d like to thank XS Sights for the opportunity to try out their great products. I’m not clumsy, but I don’t have a complete set of gunsmithing tools, nor am I a gunsmith. So it’s nice to see that their sights really are easy to install at home with basic hand tools.