If one TandemKross Taurus TX22 Race Gun Kit* is good, two must be better, right? Well, I finally caved and got my own Taurus TX22, after doing some work on a friend’s TX22. And another friend who shoots with us wanted to upgrade his as well. Since I was upgrading mine (they’re easy to upgrade), we decided to upgrade his too. Turns out I’m becoming quite familiar with Taurus TX22 accessories.
While I got the black kit, my friend is partial to red. So we got one kit in each color, and I upgraded both. Not included in the TandemKross Taurus TX22 Race Gun Kit, but still worthy additions, we also added the Accelerator Thumb Ledge and Lightened Trigger Spring to both. All three pistols are now very close, but still different from each other.
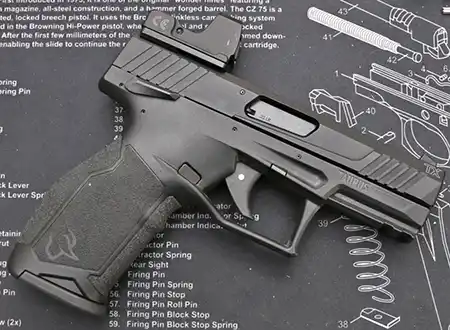
TandemKross Taurus TX22 Race Gun Kit contents
I like that TandemKross is always taking the most popular upgrades, such as these Taurus TX22 accessories, and putting them in a kit. In this case, it’s the halo Charging Ring, Victory Trigger, Titan Extended Magazine Release, and a pair of Wingman +5 Magazine Bumpers. When buying in the kit form for $142.99 (black, red is +$9), you save about $12, which nearly covers the $12.99 Lightened Trigger Spring. And that trigger spring is a must-have in my opinion. Together, this kit really transforms the Taurus TX22.
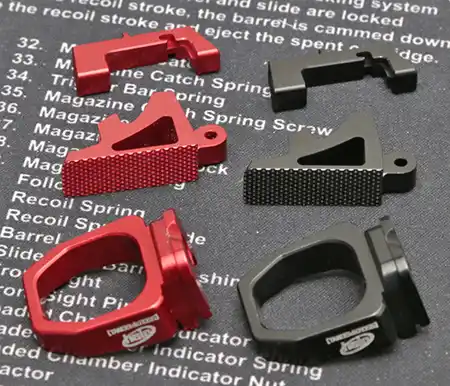
When faced with a small pile of parts to replace, I generally start with the most difficult, unless there’s an actual suggested order. In this case, the TandemKross Taurus TX22 Race Gun Kit doesn’t require any special order, so I went with what seemed logical to me. Follow along as I turn these ho-hum hi-cap rimfires into pistols worthy of competition.
Titan Extended Magazine Release for the Taurus TX22
Extended magazine release buttons are great for fast magazine changes. TandemKross designed this release perfectly—it’s larger than the OEM version but not so large that it gets bumped accidentally. No “mag dumps” of the unintentional kind here. It’s also reversible, for wrong-handed shooters. It comes in black or red. The aluminum construction features machined grooves on the face for added grip. Installation is really easy too, with no special tools needed, just some patience.
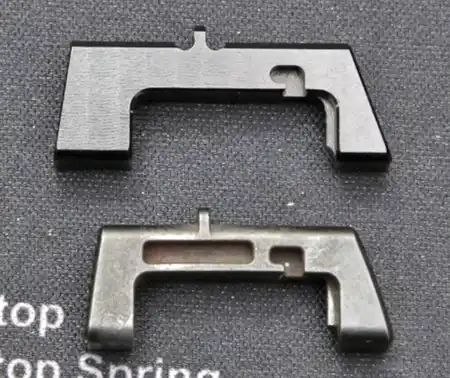
Rather than embed it, I’m linking to the Titan Extended Magazine Release installation video. Basically, all you need to do is verify that your Taurus TX22 is unloaded, drop the magazine, and pull off the slide. Take a dental pick, or thin screwdriver, and pop the spring out of the factory release, and pull the release out. When I say spring, it’s just a piece of metal that looks like a cut-down flat toothpick, With the Titan installed, carefully push the spring back in place. The entire installation video is under five minutes long. This is an easy upgrade.
TandemKross Victory trigger for the Taurus TX22
I had an advantage here, as I had already installed one of these triggers in another Taurus TX22. Like the Titan, the TandemKross Victory trigger for the Taurus TX22 is machined aluminum, skeletonized, and also available in black or red. The flat face has a texture like checkering with small diamond-shaped cuts. And it’s adjustable for pre and post-travel. Although it’s not really adjustable once installed so follow the directions carefully. I can’t imagine not combining it with the lightened trigger spring, as together, they drop the pull weight by a couple of pounds.
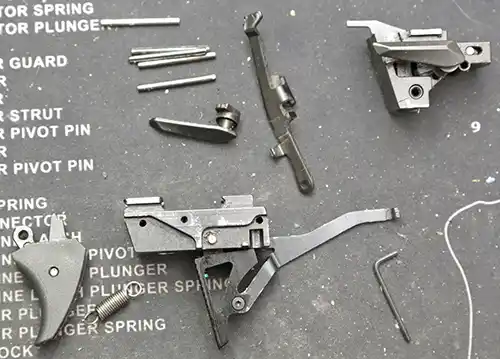
The first time I installed one, I mentioned that it was one of the trickier trigger upgrades I’ve done. Not difficult, just requiring more patience to twist parts around and fit them together. The link above will take you to the product page, which contains the installation video. You’ll find two set screws for the trigger. Paying close attention to their installation will save you the trouble of doing it more than once. It’s one of my most suggested Taurus TX22 accessories, and enthusiasts online seem to agree it makes a huge difference.
Pro tip: Make sure the trigger bar is smooth and flat where it goes through the trigger. All three that I have done were a bit rough, and got a few passes with emery paper. No one wants a new trigger with unnecessary friction. You install the lightened spring during reassembly. No extra steps there.
TandemKross halo Charging Ring for the Taurus TX22
Unlike some of its competition, the Taurus TX22 doesn’t need a charging ring. It’s fairly easy to rack the slide right out of the box. But that ring certainly makes it a little easier, especially after an optic has been added. While TandemKross offered their Challenger Charging Handle as well, I didn’t like the “Golf tee stuck in my slide” look (Seems no one else did, as they no longer carry it). They’re machined aluminum, and you can get them in red or black. The halo comes with the TandemKross TX22 Race Gun Kit though, so that’s what we installed.
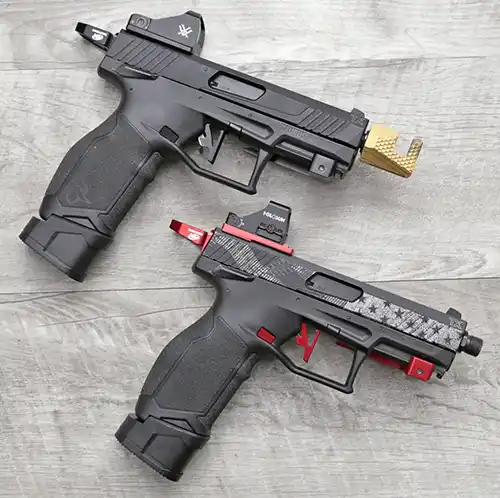
I’ll be honest here. I didn’t even need to read the installation instructions. Although I recommend that you do anyway, so check that link above. With the slide removed and the barrel and recoil assembly out, it’s a quick swap. Depress the retainer in the middle of the cover plate at the rear of the slide, and carefully slide the plate down. Don’t let the spring and detent take flight – they are under tension. Compress them, and slide the halo on, in place of the cover. After that’s done, the grip frame and the slide can be reunited again.
TandemKross Wingman +5 Magazine Bumpers for the Taurus TX22
Having a magazine capacity of 16 rounds from the factory, the Wingman +5 Bumpers might not seem like the most necessary of Taurus TX22 accessories. But the new trigger makes shooting fast even more fun, so the extra capacity is welcome. And with them, even the biggest hands have room for a good grip. A potential downside is the loss of the follower button, making loading a little slower. I think it’s worth it, and I don’t even bother with the loading tool, which would make it a little faster.
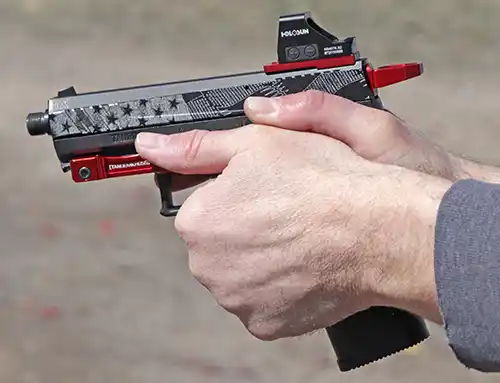
Once again, I’m going to defer to the link above, which takes you to the product page containing the installation video. All that’s required is a small and pointy Phillips screwdriver, although I do recommend eye protection since the spring is springy. And the included Green Springs are extra springy. Assembly is deceptively simple once the spring is compressed. And I have been using this style of product for years, without issues. So don’t let those little screws in plastic intimidate you. Just don’t overtighten them either.
TandemKross Accelerator Thumb Ledge for pistols
While it’s not included in the TandemKross Taurus TX22 Race Gun Kit, I do recommend adding the Accelerator Thumb Ledge. It provides a secure forward rest for the support hand’s thumb. This makes pointing even more natural, and also makes it easy to keep the TX22 on target. I’m not suggesting that recoil on a .22 LR pistol is an issue. But watching my friends shoot, there is no muzzle rise at all. We both installed ours in the 2nd slot, closer to the trigger. Snug up the bolt until it’s secure, and don’t overdo it.
Bonus! The TandemKross Steam Demon Compensator
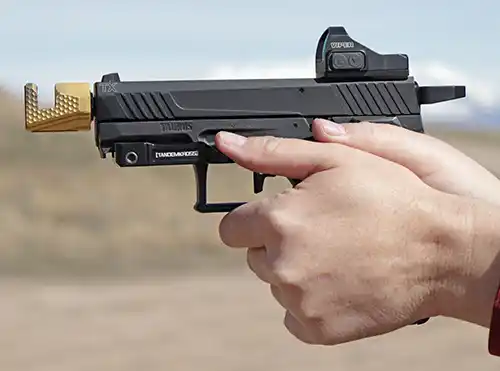
My pistol also got one more accessory while all this was going on. I had been wanting to try out the new Steam Demon Compensator. It adds a little weight to rimfire pistols, which I generally find useful. How much it “compensates” is open for debate, but whether it’s the weight on the muzzle, or the open top, or both, I like it. At $69.99 ($84.99 for gold), it’s not inexpensive. This design does appear to be easier to clean though. And really, I can’t tell you how many “Iron Man”-themed red and gold builds I’ve seen with it lately. Keep an eye out for a full review at some later date.
The sum of all the parts
Out of the box, the Taurus TX22 left me unimpressed. That’s the truth. With the addition of these TandemKross Taurus TX22 accessories, the TX22 is completely transformed. Gone is the mushy, heavy trigger. In its place is a lighter, crisper trigger with a short reset. All the better to zip through the higher capacity magazines while ringing steel with authority. And when the mag runs dry, hit the release with your thumb and swap for another. The halo makes charging easier too. I’d say it’s useful for clearing jams, but I haven’t had any with my pistol. That will probably change once I swap the Steam Demon for my suppressor.
This was a pistol that I overlooked for some time. Since it’s been upgraded, I enjoy shooting it, and it seems to be pretty capable. We haven’t had any friendly competitions yet, but with me and two friends all having very similar pistols, I expect that will happen soon enough. If you don’t want to do the full kit, I highly recommend the trigger and spring. Some quick math tells me that a new Taurus TX22 with this kit added is still less than a stock Mark IV or Buck Mark. So I’m starting to see the appeal. We’ll just need to see how it holds up long term.
Acknowledgments
As always, I’d like to thank TandemKross for their continued support. They’ve been really great about providing products for our testing and evaluation. If you want to customize your Taurus TX22, you can find all the parts shown above on the TandemKross Taurus TX22 pages.
*The Race Gun Kit was discontinued, but you can still get separate parts for the Taurus TX22. As far as I know, TandemKross still has the best selection of Taurus TX22 accessories.
If you’re running a Taurus TX22 FRT (forced?reset trigger), or thinking about building one, all of these TandemKross upgrades have been tested and run reliably with that setup. Let me know what TX22 FRT configuration you’re running and which upgrades have worked best for you.
User Experiences & FAQs
Real Shooter Experiences
- Multiple shooters on RimfireCentral report that the TandemKross Victory trigger produces a lighter, crisper break and significantly less pre-travel when paired with the lightened spring.
- Users on Reddit’s r/Taurus thread about TX22 upgrades note that the Titan Extended Magazine Release speeds up reloads without accidental mag drops – and works equally well for left-handed shooters.
- Several discussions on RimfireCentral mention that the Steam Demon compensator adds helpful muzzle weight and looks great while staying easier to clean than many other comps.
- Across TX22 owner threads, many report that these upgrades together make the pistol competition-ready at a fraction of the cost of higher-end .22 platforms.
FAQs
Will the Victory trigger fix the TX22’s pre-travel and gritty pull?
Yes. Most owners say the Victory trigger removes much of the pre- and post-travel and provides a noticeably crisper break. It performs best when paired with the lightened trigger spring for about a two-pound pull reduction.
How difficult is installation for the kit parts?
The Titan magazine release and halo charging ring are simple drop-ins using basic tools. The Victory trigger takes a bit more patience – following the TandemKross video guides helps a lot.
Do I need the lightened trigger spring?
It’s highly recommended. Combined with the Victory trigger, the lighter spring reduces pull weight, smooths operation, and enhances overall shooting feel.
Will the Titan magazine release cause accidental mag drops?
No. It’s designed to be more accessible without being oversized, so shooters don’t experience unintentional releases. It’s also reversible for left-handed users.
Are the Wingman +5 bumpers worth it?
They boost capacity and add grip length for better control. The only tradeoff is losing the follower button, making loading a touch slower. Most shooters find the added rounds and grip space well worth it.
Does the Steam Demon compensator actually help?
Reports vary — it doesn’t dramatically cut recoil, but it does add muzzle stability and balance. Many shooters like the look and easier cleaning compared to other comps.
Any reliability issues after installing these upgrades?
Most users report no malfunctions after installation. Occasionally, feeding issues can occur from worn magazines or spring misalignment. Keeping mags clean and checking spring fit solves most problems.
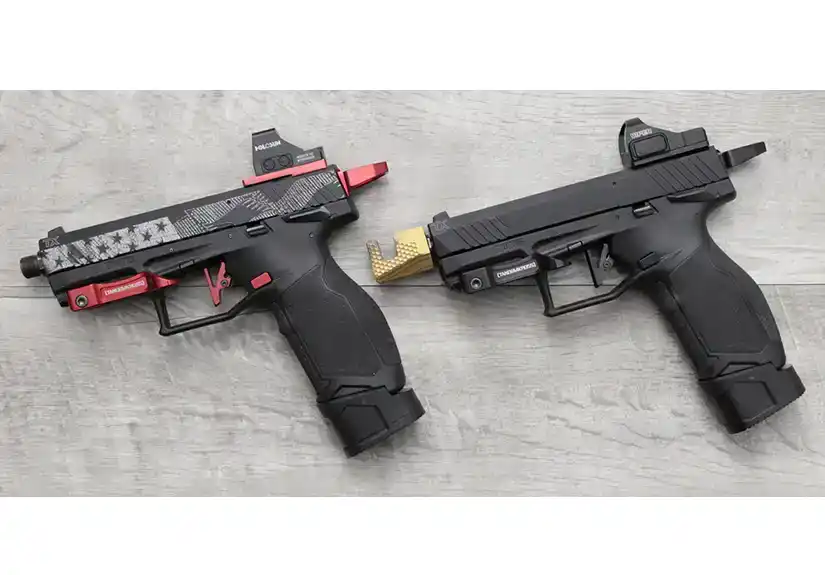
Only thing missing is an FRT trigger
Should be delivered in a few days. 😉
It’s not made by TandemKross and this is obviously an advertisement for TandemKross.
It’s a review, not an advertisement. And after spending some time with the FRT installed, I find the TX22 is more fun without one. The accessories on this page all enhance that.