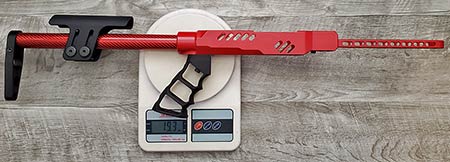
The new Carbon Fiber Stock Kit from Crazy Ivan is the perfect way to complement an already awesome chassis design. At a mere 8.4 ounces, the Crazy Ivan Comp Lite chassis is one of my favorite 10/22 accessories. While they can accept just about any AR-pattern stock via a receiver extension (buffer tube), most are too heavy. So Karl, the man behind Crazy Ivan, set out to fix that. He created his own stock that is both customizable, and light. Then he added an adjustable cheek riser as an option. This 6.7 ounce kit (as configured for my rifle) is a definite winner.

Kit contents
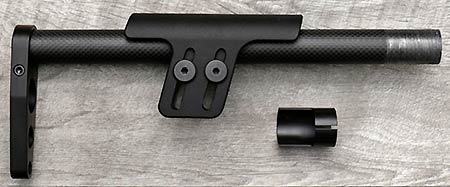
Each kit includes a carbon fiber tube that can be cut for the perfect length of pull. Black is included, and other colors are $10 extra. There is also an insert for the chassis that holds the tube in place. At the other end is a machined aluminum stock. And because details matter, there’s even a little Nylon12 end plug. Plus, the bottom hole of the butt stock is a QD sling swivel socket. Details!
For those not aware, the Crazy Ivan chassis is available in a variety of colors. Which is why the carbon fiber tube is also available in different colors. These options include camo, silver, blue, red, green, pink, and purple. Maybe not hunting colors, these are great for Steel Challenge builds, as well as fun plinkers. Since no epoxy is used, it’s easy to swap out different colors (or change your LOP with a longer tube) too. Might have to build a purple one for my wife.

Riser options
There are two foam riser options, for those running low sights and optics. Both are 6″ long, with the low option only 0.265″ tall, and the high at .450″ tall. These are great for minimalist builds while still being more comfortable on the cheek than bare carbon. They just slip right on, and at $10, are an easy choice where weight and comfort matter.
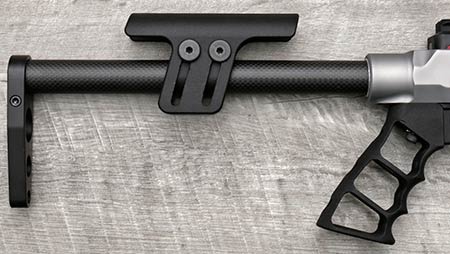
For taller optics, such as scopes, there is a fully adjustable Nylon12 riser. This is a two-piece setup, with a block and adjustable cheek piece. The reversible block gives a huge range of adjustment, from just off the carbon tube, to well over an inch of elevation. No matter how tall your optic is, this should accommodate it. It’s a $75 option.

Installation
The installation process requires no special skills, just patience, and a bit of trial fitting. First step is to cut the tubing about 1.25″ short of the desired length of pull. I measured, wrapped it in masking tape, marked the tape, and cut it on my scroll saw. I’ve also used a small hand saw to cut these tubes. Install the included aluminum sleeve into the back of the chassis, then slip the cut end of the tube in. Offset that slot in the sleeve to either side of the set screw in the chassis, and tighten the set screw. Push the plug into the other end of tube, and install the butt plate. Tighten the butt plate until it can’t turn, nothing more. Done.
With the tube installed, the riser is pretty simple, but care should be taken with positioning, before tightening everything down. Remove the butt plate, and slip the riser block on. Most users will want it in the low position, but it’s reversible. Find the correct fore and aft location, and when you’re certain of the position, tighten the set screws. They’ll dig into the tube, so don’t overdo it. Then install the riser, set the height, and tighten down the two cross-screws. Probably easier to look at the photos than try to explain.
In use
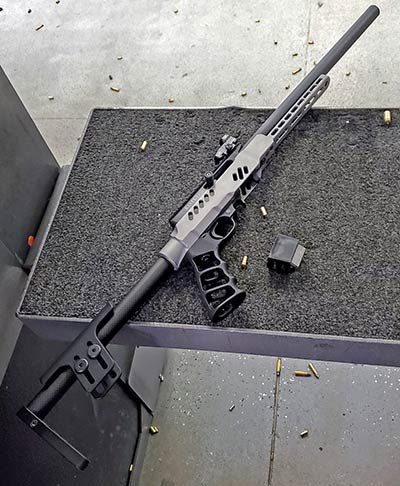
I tried the stock with both a small red dot sight, and a low power scope. It was super quick and easy to get just the right cheek weld. With a Vortex Venom and 16″ WhistlePig barrel, this is a 3.7 pound rifle. Switching to a Vortex Diamondback 2-7×35 with rings added about a pound to that. A sub-5 pound rifle is great for kids, or a day in the field. Although I was only swinging between targets that were a few feet apart, it’s easy to appreciate the low weight. **Note that WhistlePig is now known as Acculite22.com.**
Being able to adjust the cheek rest up or down with just a hex wrench made it easy for other users to get comfortable with my rifle. There’s a little trick to get some LOP adjustment out of it as well. Because the tube fits so deep into the chassis, it’s possible to get about an extra 1″ of extension by pulling it out a bit. If I was regularly letting kids shoot this, I would cut the tube 1″ shorter, and not install it all the way. Then I could reduce the LOP as needed. Of course, it requires removing the grip to get to the set screw right behind it, but that’s not a huge burden.

Conclusion
For a competition rig, this is an easy choice. Without the handguard, and swapping the barrel for a super lightweight competition barrel, it’s a 3 pound rifle. That’s about the lowest inertia rifle you can build for Steel Challenge, and well worth the cost to stay competitive. When it comes to more leisurely pursuits, some may question the cost. A chassis, grip, handguard, and the full stock with riser is over $400. But from what I have seen on various forums, that’s a totally realistic sum when building a fully custom rifle. For the weight-conscious, it drops to about $300 if you forgo the handguard and Nylon12 riser. Either way, it’s another great option when building your next 10/22. Check it out at crazyivanllc.com.