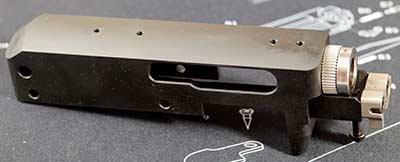
Late last year, I got this idea to build up a project rifle around a Brownells BRN-22T receiver, and some spare parts I had. This is their Ruger 10/22 Takedown compatible receiver, and despite some unflattering reviews, I thought I’d give it a go. Besides, I already had plenty of the parts for it, so worst case, I’ll have wasted $100 on a receiver. Since Ruger registered “Takedown”, I had no idea what to call it. Based on the final result, “Trainwreck” would have been a good name.
The receiver
The Brownells site has plenty of info describing the bare receiver, which they source from Azimuth Technologies. They’re precision-machined from 6061 aluminum billet. They machine them instead of forging them to get tighter tolerances. This can result in a precise fit with other parts, which should lead to better consistency. At least, that’s the theory. After machining, they get Type 2 hardcoat anodized finish. This is similar to what’s on your AR15, in color anyway. I don’t think it’s quite as durable, but only time will tell.
Now, I understand that they offer regular receivers as well as the takedown version. And maybe they already had their CNC program set up for the standard version, so it just got a little tweak for the takedown. But they put a cleaning rod hole at the rear of their takedown receiver. Wtf Brownells? I gotta go buy a plug for that hole. Because I’m sure not planning on running a cleaning rod through the receiver, when I can just take the barrel right off.

Bolt installation issues
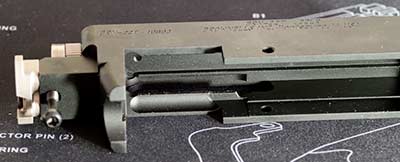
It seems that factory bolts fit fine, and aftermarket bolts require a simple mod. Not a big deal, really. Your factory bolt is cast, rough, and a bit sloppy anyway. Five minutes with a fine file is all it takes to fit the bolt. Don’t use a Dremel! The amount you might need to remove is so small, power tools are overkill. And reading the Brownells site, it seems that not everyone even had an issue anyway. Check out the image below, to see the area I’m referring to.

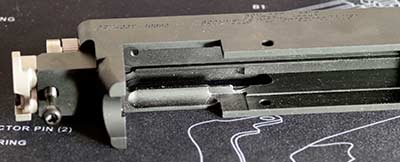
In the next image, you can see the modified receiver. I removed some material, did a test fit, and removed some more. After three tries, it was perfect. The aftermarket bolt dropped in and was snug, but it didn’t cycle very smoothly. I threw in a stock bolt, just to compare. It’s a bit looser, but also cycled much better. So you could use a factory bolt. Initially, I felt that if you’re building a rifle from a bare receiver, you’re going to spend the money for a better bolt. As I found out, that logic doesn’t work here. At least not with my receiver, if I wanted a reliable rifle.

What’s next?
Before I buy parts for any projects (and not just firearms), I usually go over everything in my head. I need to figure out budget, compatibility, and the order things go together. A lot of research gets done, a lot of reviews get read. Prices online and locally get compared. When the entire project gets sorted out, I know exactly how much it should cost. Then I factor in whatever I have to buy for my wife, when she sees how much I just spent on another rimfire. Lol.
For this rifle, I already had the stock picked out, along with the barrel, bolt, and trigger group. Unfortunately, things didn’t go as planned. So the bolt and trigger group ended up being set aside for another project. And I had to use a factory bolt and BX trigger instead. That will be covered in more detail in a future article. As usual, I planned to top it with a Vortex scope. I found a good deal on the Vortex Diamondback Rimfire 2-7×35, so we’ll give that a try.
If you want more details, check back soon for the next update. In the meantime, feel free to share any thoughts, criticism, or suggestions in the comments section.