The TandemKross Marksman Sight System for the Browning Buck Mark is designed to do more than simply replace the factory sights. Its biggest advantage is that it allows many popular pistol optics to co-witness with the fiber optic sights, giving Browning Buck Mark owners the ability to run a red dot while still retaining visible backup irons.
For shooters upgrading the Browning Buck Mark, that combination is a major selling point. The system adds bright fiber optic sights for faster target acquisition while also providing an integrated optics mounting solution that keeps the optic low enough for a usable co-witness with the iron sights. I briefly mentioned it in my second Buck Mark article, but it deserves a closer look on its own.
In this review, I’ll take a closer look at the TandemKross Marksman Sight System for the Browning Buck Mark, including installation, optic compatibility, co-witness capability, and how it performs at the range.
TandemKross Marksman Sight System for the Browning Buck Mark
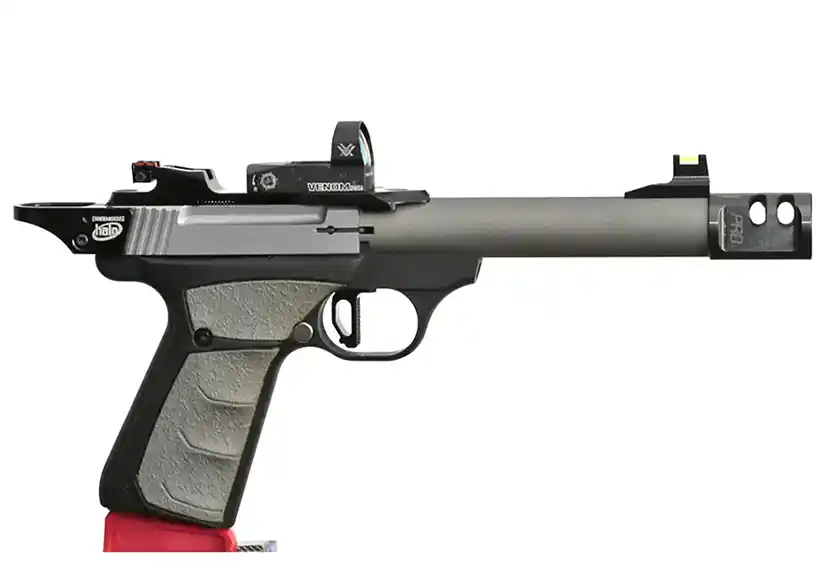
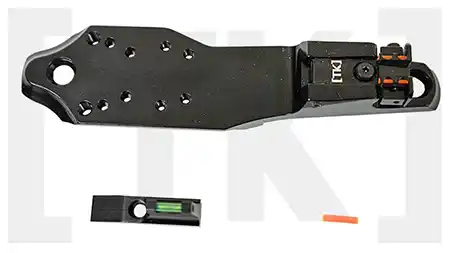
TandemKross machines the two main pieces of the Marksman Sight System from aluminum. Out front is a replacement tall fiber optic sight with replaceable light pipes. This allows the shooter to choose between red or green. It replaces the factory front sight and matches the contour of OEM barrels as well as those from TacSol.
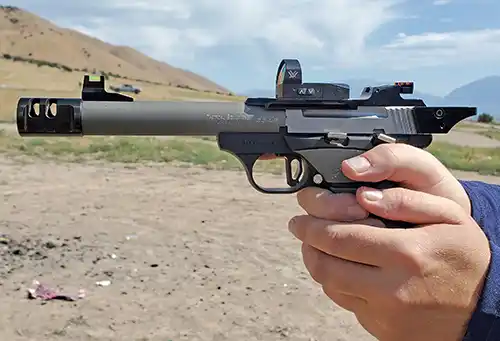
I did find a minor fitment issue with the aftermarket barrel, but it was an easy fix and would not be a concern with the factory barrel. This is where I would post a photo of the kit’s contents, had I taken one before assembly. Instead, here’s a photo of everything installed.
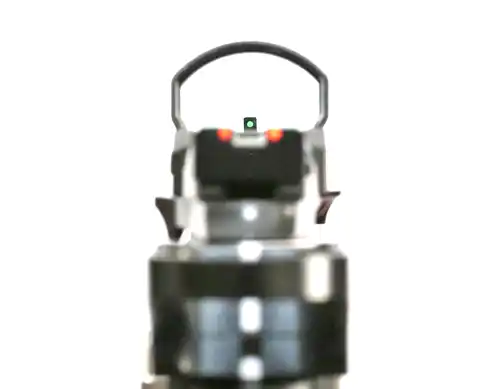
At the rear is where all the magic happens. The typical Picatinny rail and extra height of an optic’s clamping system would make co-witnessing nearly impossible. Replacing the rear sight and/or factory Picatinny rail is a direct mount plate. TandemKross has drilled it for the most popular red dot options and includes a fully adjustable fiber optic rear sight. Its low profile, combined with the slightly elevated sights, allows it to co-witness with most optics. In my opinion, this provides the best of both worlds.
Installation of the Marksman Sight System
Installing the TandemKross Marksman Sight System for the Browning Buck Mark is simple and straightforward. You can easily do this job at home because all the required tools and hardware are included. Remove the two screws for the factory rail or rear sight and replace it with the Marksman mount.
The only real pitfall is paying attention to the screws, as the front (short) and rear (long) screws are different lengths. Other than that, it’s one of those jobs where it takes longer to describe the process than it does to actually complete it.
For the front sight, simply remove the single screw holding it in place and swap the new sight in. If you happen to have a non-factory threaded barrel like my TacSol barrel, the front sight does overhang it slightly. A quick touch-up with a small file resolved that. This modification is not necessary with OEM Browning Buck Mark barrels.
TandemKross recommends that all fasteners be hand-tight with a small amount of medium thread locker. I used a tiny drop of blue Loctite.
Installation of the Optic
On the TandemKross website there is a helpful compatibility chart for optics. It lists footprints such as the RMR, Noblex/Docter, Shield RMS/SMS & Holosun K, and C-More RTS. As mentioned earlier, all the necessary screws, pins, and even a gasket for compatible optics are included.
My optic of choice for this pistol is the Vortex Venom 3 MOA red dot. While the 6 MOA version is great for speed, I prefer the smaller dot for precision shooting with this pistol. I noticed a tiny amount of play when installing the optic, so I recommend tightening the screws slowly and alternating between them to maintain alignment.
I used a laser bore sighter to confirm the initial zero once the optic was installed. The fiber optic sights were already aligned with the red dot, which made the process much easier. I still brought the adjustment tools with me to the range in case any fine tuning was needed.
Adjusting the Fiber Optic Sights
On the top of the rear sight is an elevation screw. Tightening it lowers the rear sight while loosening it raises the rear sight. On the right side of the sight is the windage adjustment screw. Tightening it moves the sight right, and loosening it moves the sight left.
Removing the front sight and flipping it over reveals a tiny set screw at the front. Loosening it removes tension on the pin holding the fiber optic light pipe so that it can be pushed out. Swap for another color or replace the current one if damaged.
A Few Words About Aesthetics
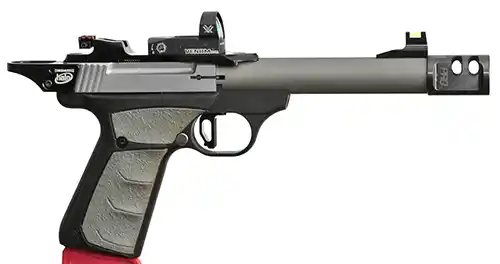
Yes, the design is slightly asymmetric with a cut on the right side above the ejection port. At first I thought it might bother me, but once installed it’s hardly noticeable. My Browning Buck Mark has a matte black grip frame and matte grey barrel. While I might prefer a less glossy finish such as a Type III hard coat, that would likely increase the cost.
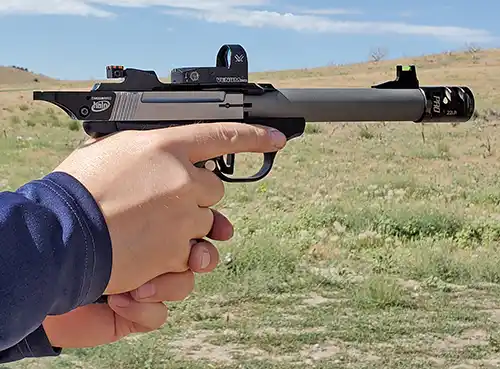
At the Range with the Marksman Sight System for the Browning Buck Mark
I consider this Buck Mark to be my “field pistol”. It’s the ideal rimfire companion for range day plinking as well as hiking or camping. Before installing the Marksman system I was perfectly content running the Vortex Venom red dot alone. Now I have the option of using bright fiber optic sights as well.
The Verdict
If you’re interested in upgrading your Buck Mark with the TandemKross Marksman Sight System, you can check current pricing and compatibility here.
Whether using the sights or the optic, this pistol is still more accurate than I can shoot. The addition of the Marksman Sight System simply makes the platform even more versatile.
If you already have a Browning Buck Mark and want to pair adjustable fiber optic sights with the option to co-witness an optic, this upgrade is an easy decision. TandemKross has created a system that works well and installs easily.
As always, I’d like to thank TandemKross for providing yet another great product for me to test and share with my readers.
Fitting the Marksman’s Included Front Sight to the TacSol Barrel
Since most buyers will be using the Marksman system with an OEM barrel, I kept this section separate. If you happen to be using an aftermarket barrel like my TacSol Trail-Lite, some minor fitting may be required.
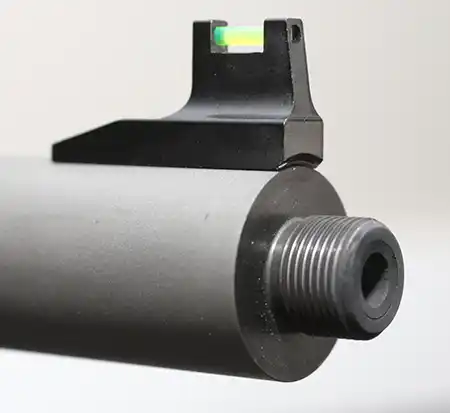
In this photo you can see the minimal overhang. This would not be an issue with the thread protector installed, but removing it to mount a suppressor would cause some interference. This is not a TandemKross issue and does not occur with factory Browning Buck Mark barrels.

Great write-up! Thanks for letting us know about this amazing-looking product, I can’t wait to try one for myself.
I take this pistol with me on just about every outing, and each time, I’m reminded how this mount makes it that much closer to perfect.