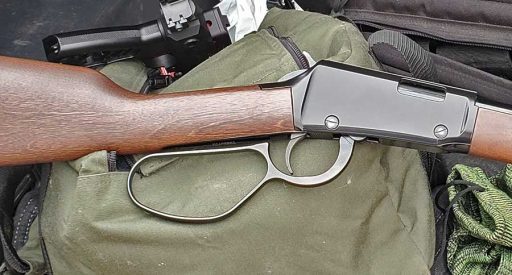
Thinking about installing a Large Loop Lever on your Henry Lever Action rimfire? You’re not alone. Henry Repeating Arms has sold over one million of their Classic Lever Action .22 rifles. And that’s just the one model. There are several other rimfire variants in different calibers, finishes, or configurations. Most come with the standard lever, which is sufficient for smaller hands and gloveless use. But if you’ve got larger hands, or shoot with gloves on, you’re going to want the Large Loop Lever. This very worthwhile accessory is only $50, and can be installed at home. All it requires is a hollow ground screwdriver of the appropriate size, a small punch or similar object, and a little patience.
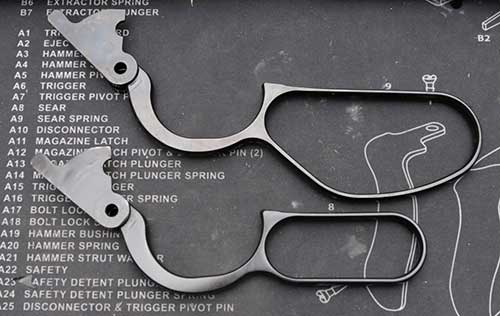
Ordering the Large Loop
On the Henry website, there is a handy dropdown for selecting your rifle. Both of mine are part of the H001 series, which includes the Classic .22 LR and Classic .22 WMR. For this article, I’ll be installing the lever on my .22 LR version, and clarifying the minor differences between it and the .22 WMR or .17 HMR. Note that the lever comes with instructions, and I am going by them, but including some photos. Henry’s provided drawing is more than sufficient.
Installation: Removal
The Large Loop is a simple “drop-in” part requiring no gunsmithing or special tools. First step is to start with a clean, well-lit area. While I joke about eye protection, I usually just keep some readers handy for working with small parts. After verifying that your rifle is unloaded (check it twice), remove the inner magazine tube assembly. Using a suitable screwdriver, remove the single screw holding the stock in place. Finally, remove the four screws holding the side cover on. Now, pull the lever back half way, and remove the cover by lifting up and back.
There is a locking bar pin that will need to be lightly tapped out with a punch. Set that aside, with the locking bar, and its spring. Note that for the .22 WMR and .17 HMR models, there is a 2nd spring nested inside the larger one. If you have either of these models, you’ll need a dummy cartridge or empty shell at this point. This is required to hold the carrier feed lever in place. Next step is to punch out the pin for the lever, and carefully pull the lever out from the bottom of the receiver. Note: it’s the pin that the lever pivots around. Do not remove any other pins.
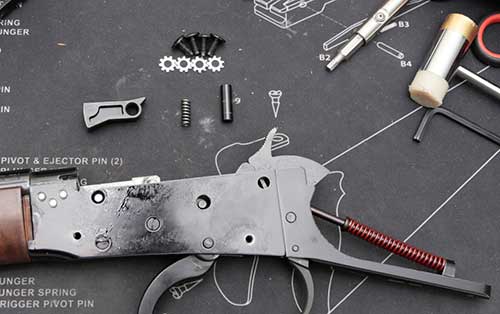
Installation: Replacing the lever
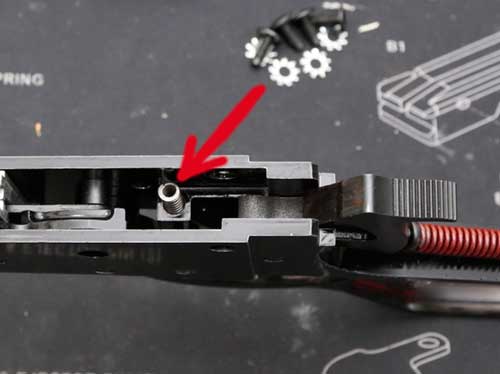
At this point, it just takes a little patience to work the Large Loop lever into place. Feed it from the bottom, and then install the pin which holds it in place. From here, the locking bar needs to be reinstalled. For me, this was the trickiest part. Carefully seat the spring first. I slid it off a bent piece of wire to get it into place. Also note the tapered part of the locking bar faces the rear, as it’s being reinstalled. The included instruction sheet shows this pretty well, in case you forget which end goes where. Ease it into place, so the spring sits in the recess of the locking bar. This required a few tries to get right. Once it’s in place, the pin can be tapped back into its spot as well. At this point, the hardest part is done.
Now, it’s a matter of wiggling the cover into place. Kind of nose-diving it seemed to work best for me. If it’s not going on, make sure no pins are sticking too far out of the receiver. Next, reinstall the four screws (don’t over-tighten) with their locking washers. Of course, the final step is to reinstall the butt stock. If it doesn’t want to go together smoothly, there’s a chance you are trying to install it upside down. Or so I’ve heard. Because that would not have happened to me… This would also be a good time to reinstall the magazine tube assembly.
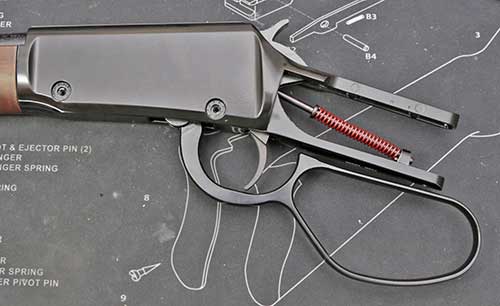
Function test
As usual, a function test should be performed after any disassembly or replacement of parts. Even though it’s been checked, verify again that it’s not loaded before the next steps. Then work the lever and make sure the trigger drops the hammer (with your thumb on it) while pointed in a safe direction. Repeat this a few times, or as many as necessary for the full cowboy effect.

Additional notes
Although my rifle wasn’t too dirty, this is also a good time to clean the bolt and apply some light oil while it’s apart. Since it was apart on the bench I was able to inspect the internals and make sure everything was clean and lubed. Yeah, I had to poke around and see how things worked too. If you cock the hammer while it’s apart, and then pull the trigger, the hammer spring may take flight. Reinstalling it is easy enough, with the hammer fully forward. So don’t panic.
Final thoughts
My current Henry lever action rifles are some of the most fun firearms I own. Nearly everyone loves shooting them, especially the Classic .22 LR, when loaded with subsonic ammo. It’s so quiet that even the newest shooter doesn’t flinch from the noise. And they aren’t at all intimidating to new shooters. No removable magazine, no bolt to charge, and no safety to fumble with. Adding that Large Loop just makes it easier, and a bit more comfortable for those with bigger hands, or gloved hands. I can work the lever faster now too, which adds to the fun. Get yours here.
A special thanks to the folks at Henry Repeating Arms for providing the Large Loop used in this article. And for continuing to make great firearms, right here in America.
Comments? Questions? Do any of our readers have a Henry with the Large Loop? Feel free to share below.
Anyone knows diameter for h001 leverloop ?what is it thikness?