Although not essential, these are two KRG Bravo chassis upgrades I highly recommend. But let me back up a bit. Several months ago, I got a KRG 10/22 Bravo chassis to review. And I really liked it. This chassis is an excellent foundation for anyone looking to build an accurate rifle.
In my review, I mentioned a couple of accessories that I felt would improve it even more. One was the hook-style cover. Shooting off the bench, I find a hooked stock/chassis ideal. The other is their Rimfire Tool-less LOP mechanism. When I initially set up the Bravo, it was plenty warm out, and I could shoot in a t-shirt. As cooler weather set in, I realized that a light or heavy jacket meant I would have to remove and add spacers, depending on the temperature. This is also a rifle that I don’t mind friends shooting (it’s great for their confidence). So having that adjustability isn’t a selfish thing.
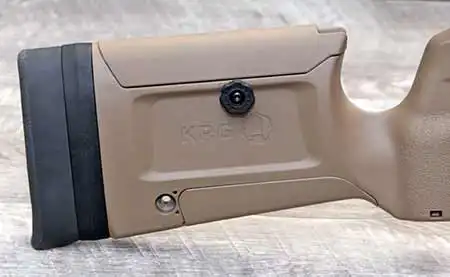
The KRG Bravo Chassis Hook-Style Cover
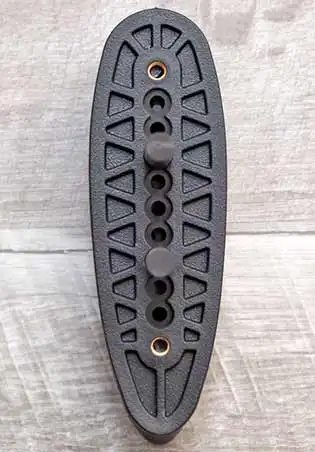
At $10.49, this is one of the least expensive of the KRG Bravo Chassis Upgrades. But it’s worth its weight (0.2 ounces) in gold to me. Actually, gold prices are out of control. But you get the idea. It’s a very simple piece of polymer that replaces the standard cover. A single screw holds it in place. Rather than an angled surface on the underside of the buttstock, it provides a nice place for your support hand. As far as KRG Bravo chassis upgrades go, this is something I expect many shooters would include in their initial order.
Installation
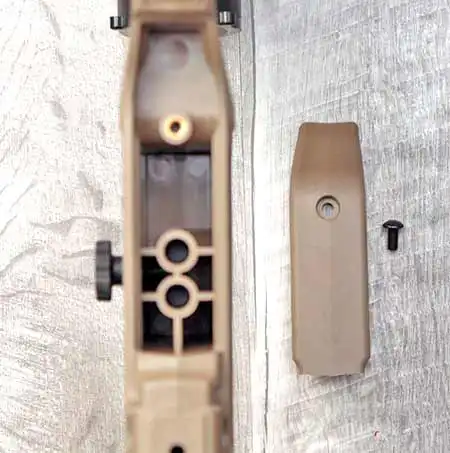
If you can remember “righty tighty, lefty loosey”, you can swap this part in a couple of minutes. First, make sure your rifle is unloaded, if it’s already installed in the chassis. Then flip over the chassis, and remove the existing screw holding the angled cover on. Pop the hook-style cover in place, and gently tighten it down. Too much torque may strip it out, or cause the hook to bend. So just give it enough to keep it in place. It’s not a lug nut.
With the hook installed, it was time to turn my attention to the Rimfire Tool-Less LOP. Might as well get it all done at once while I had my tools and my camera out.
KRG Rimfire Tool-Less LOP
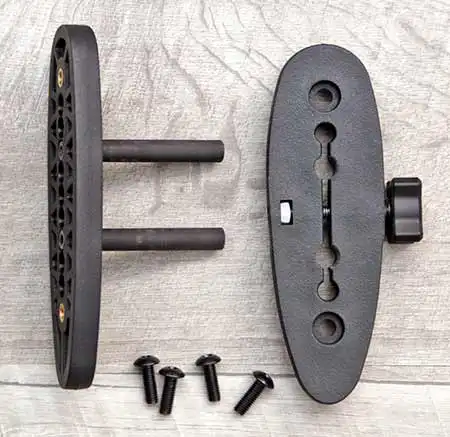
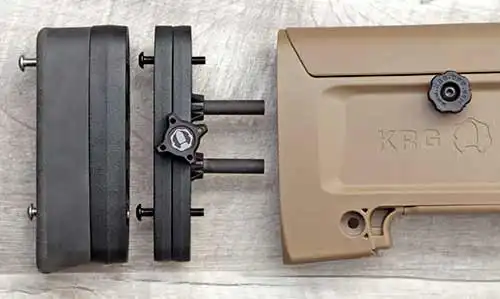
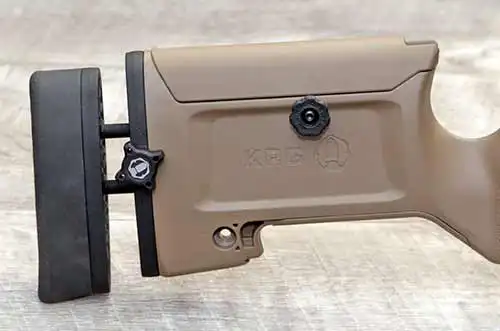
With no spacers, this $50.95 accessory offers a length of pull from 12 inches to 13.5 inches. I don’t need it quite that short, so I used the thicker rubber buttpad. Going super compact isn’t my goal, just having some range is. This does exactly that, without the need for tools once it’s installed. And the 4.2 ounces it adds are inconsequential on a rifle that’s pretty much only shot from a bench. One section gets installed in the stock, and has the knob and clamp. The other piece has the buttpad and rods that slide in and out of the clamp.
Now, I need to point out that this accessory has more than one trick up its sleeve. Beyond the obvious easy length of pull adjustment, it also allows you to vary the buttpad height. That’s not a tool-less function, but it is still a big deal to me. Those rods in the rear piece can be moved up or down, to get the desired height. After a bit of tinkering, I moved them each up one hole, lowering the pad about 1/4 inch. So far, that seems to work well for me.
Installation
Depending on the buttpad height desired and range of length of pull, there may be a little bit of experimenting necessary during installation. After removing whichever pad is currently installed, carefully screw the section with the clamp into the rear of the stock. The second half can then be slid in, and locked down with the clamp. If no buttpad height adjustment is necessary, install the pad itself using the appropriate length screws.
As mentioned, I found that lowering the buttpad provided a good fit for me. Of course, that was after I had installed the thick rubber buttpad. So off it came, to access the screws on the ends of the posts. Not a huge deal, just a little trial and error. Worth the extra effort. The photo below shows the original pad and spacer on the left, with the new adjustable mechanism to the right.
After playing around with the height adjustment, and finally getting that dialed in, I installed the rubber buttpad again. Length of pull from the rear of the pad to the skinny, flat face of my KIDD two-stage trigger is now variable from 12-5/8″ to 13-5/8″. It actually has a bit more range than that, but that’s about what I was looking for.
How much difference do they make?
I’ve only had a couple of trips to the range since installing these two KRG Bravo chassis upgrades, and their positive impact is noticed. Definitely better ergonomics and comfort. My support hand rests nicely in the hook, and I can set the length of pull more precisely. In theory, this should help me with consistency.
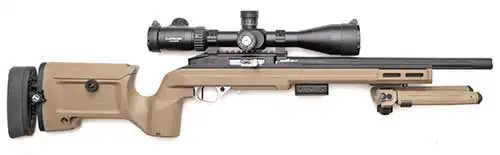
As much as I like to get out and ring some steel, I realize that I need at least one rifle for turning in some tiny groups too. Or maybe push my KYL rack back a few yards more, and really challenge myself. This rifle is the right combination of parts and an excellent fit for exactly that. It’s still not perfect though. From a bench or table, the scope height is okay. But I will need taller rings to shoot prone comfortably. And then the adjustable cheekpiece will be even more appreciated. In the meantime, it’s still pretty much my “dream build”.
If you’re considering a similar build, check out the KRG 10/22 Bravo chassis here. You’ll find plenty of other useful and innovative KRG Bravo chassis upgrades on their site as well.