
If you haven’t shot the Ruger SR22, I suggest you seek out an opportunity to try one. They’re compact .22 pistols with some quirks, but fun little guns to shoot. While the one I have desperately needs a threaded barrel for a suppressor, it’s getting a few TandemKross upgrades first. Although the Ruger SR22 may not have as many aftermarket options as other pistols, it’s got the important ones. These items should be familiar to anyone who’s read my past articles about Mark IV, Victory, or Buck Mark upgrades. They’re a mix of parts that improve reliability, and others that just make shooting a bit more fun.
Sentinel Stainless Steel Captured Spring Guide Rod for the Ruger SR22
Ruger ships the SR22 with a plastic guide rod. It does the job, but it’s a separate spring and rod. And again, a plastic rod at that. I’m sure that this is done for cost savings. And most shooters will either not notice, or just not care. But a stainless rod with a captured spring is a one-piece unit that’s more durable. The latest Sentinel also uses a double spring design for more consistent force and performance. Not going to lie – the stainless also looks better than that piece of plastic visible under the Ruger’s thick stainless barrel.
This is where I would usually share how the installation process went. But I bought this pistol from a friend, and he had already installed the Sentinel. So I’ll just point out that if you can remove your slide, you can replace the spring and rod. Clear the pistol, double check that it’s empty. Pull the takedown lever inside the trigger guard, and remove the slide. Remove the spring and rod, and replace them with the Sentinel, making sure the stainless “nose” is on the muzzle end. Replace the slide, flip the lever up, and do a function check. Yes, it really is that easy. On the page where they sell the Sentinel, there is an installation video, which is all of 1:48 long. Retail is $24.99, and you can find the Sentinel Stainless Steel Captured guide rod here.
Green Springs Magazine Springs for the Ruger SR22
Although the reliability of ammo may or may not have improved much lately, most .22s need all the help they can get when it comes to being completely dependable. One way to ensure better feeding is by swapping the magazine springs for Green Springs. These springs generally offer a bit more force, making sure the last rounds feed as assuredly as the first ones do. And they are made of missile wire. Had to look that one up. It’s ultra-high tensile wire, usually custom-made for a specific application. In this case, that translates to a much longer life than the OEM springs.
Installation is easy enough, and I’m going to let Bill demonstrate it, because I admire anyone who can take his job so seriously. Please be sure to heed the warning about eye protection. I’ve had plenty of stuff fly around my office when replacing magazine springs. Note that the use of a pencil makes this so much easier. Finding a pencil may be the most difficult part. As usual, Green Springs come in a 3-pack for $9.99.
SuperGrips for the Ruger SR22
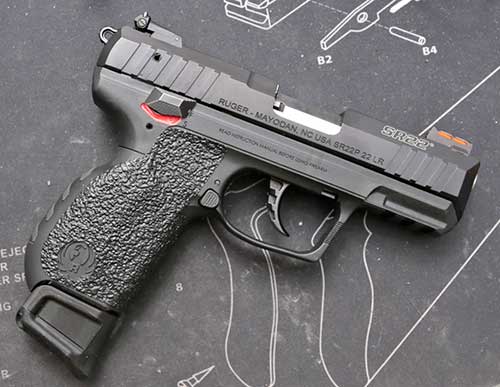
Ruger’s polymer for the grip isn’t super slick, and it does have a bit of texture. But after being spoiled with aftermarket grips on most of my other pistols, I wanted something with a little more traction. Especially since I’m shooting outdoors, where a sweaty grip isn’t uncommon. Because grip panels are not an option, this textured rubber will do the trick. The product itself is durable but thin enough that it doesn’t really add much width to the grip. It comes with a larger piece that wraps around the grip area, and a smaller piece for the underside of the beavertail, which I didn’t use.
Installation: Peel. Stick. Well, it’s about that easy. Carefully wash the grip area with dish soap, not solvents. You just want to get any dirt, debris, and oil off. Also, wash your hands, then heat the grip area with a hair dryer. A heat gun might work, but maybe only on low, and not too close. Remove the backing, and wrap it around the front of the grip frame and along the sides, without touching the adhesive. Go slow, and reposition if necessary. Before you reapply heat, it’s possible to make some adjustments. Once it looks good, hit it with the heat again. I usually press down all the edges with my thumb, and hold it tightly too, to make sure it’s fully adhered. *This product was only $13.99, but has been discontinued. Scroll down a little further or to the top of the page, and you can see it installed.

Wingman +5 Magazine Bumper for the Ruger SR22
Now that I’ve covered some “reliability ” and ergonomic parts, here’s the fun stuff. The Wingman adds five rounds more capacity to your magazine. Whoa, that’s 50% more capacity! I’m more accustomed to +5 for 9mm magazines, and maybe +1 or +2 for .22 LR. So that’s a nice increase. Although it comes at a cost. Namely, the follower button. It’s gotta go, and with it, the last round slide hold open. Is it worth it? Well, my Ruger SR22 came with eight magazines. So having a few that hold 15 rounds is definitely worth it to me. Plus, having that extra length is nicer for big hands like mine. And, I have a workaround for the lack of a follower button. But first, Wingman installation.

Like the installation of the Green Springs, this requires disassembly of the magazine. Remove the base plate, the spring, and that little plate on the bottom of the spring. Pull the follower down, remove the follower button, then remove the follower. Set the plate from the spring as well as the follower button aside, as they are no longer needed. The Wingman is comprised of two pieces. Take the piece open at both ends, and slide it over the top of the magazine body, down to the base. Reinstall the follower and spring. Slip the bottom half of the Wingman onto the magazine, with the spring sliding into its place. Use a small screwdriver to install the screws which hold it all together, and you’re done. As always, TandemKross includes a great installation video on their site. Find that video as well as a 2-pack of Wingman Bumpers for $24.99 here.
Speed Loader and Lanyard for Single Stack Magazines in .22 LR
Whether or not you give up the follower button in exchange for five extra rounds of capacity, this tool is handy. Due to the slightly wider magazine of the Ruger SR22, some generic magazine loaders don’t work with it. So TandemKross designed a loader that works for these magazines, as well as the Walther P22. It works like most inexpensive centerfire pistol loaders, depressing the follower so that a round can be loaded. While it can make loading magazines a bit faster, it also saves your thumb from pressing a follower button. And for those that have trouble manipulating things with their hands, it’s definitely a big help.
Per the video below, just slide the Speed Loader over the magazine so that it and the follower form a shallow V. If you don’t see that, it’s on backward. From there, I use my thumb in the hole to hold the follower down, while I feed rounds in. Ten or 15, doesn’t matter. Nor does the spring tension become a problem, as there’s more leverage this way. I attached the lanyard to my “mag bag” so that it’s always with the magazines. Certainly worth the $9.99 asking price, and sometimes it’s on sale for a dollar off. Find the Speed Loader here.
Wrapping it all up
That’s it for my Ruger SR22 upgrades. It feels better, cycles reliably, and I certainly enjoy the extra capacity of the +5 magazines when out plinking. More rounds equal fewer magazine reloads. If it had a threaded barrel, I might get a compensator for it, but that would really only be used as a thread protector because we all know that when it comes to rimfire, “Suppressed is best”. What do you think?
As always, I’d like to thank TandemKross for providing their great parts for this makeover. Their continued support of rimfire enthusiasts is certainly appreciated. Check out all their products on the official TandemKross website.