It’s not uncommon for someone to purchase a completely stock Ruger 10/22, with the intention of “maybe doing a few mods”. Over time, that sometimes results in nearly every single OEM part being replaced. In some cases, even the receiver gets swapped out, and the owner eventually ends up with two complete rifles. No one ever said this was a bad thing. Of course, some skip the stock rifle and go straight into a custom build, starting with a new aftermarket receiver. That’s what has happened to one of my rifles over the years, and it’s been interesting to follow that evolution. Here’s how it has played out.
First, the CST Centrix-22 receiver
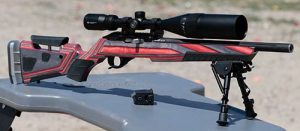
My original CST Centrix-22 build was a fun and accurate rifle. This receiver was the basis for one of my first projects, and it’s a pretty good measure of where I was as far as budget and skills at the time. It also represents the somewhat haphazard approach I took with some projects back then. After winning the Ruger factory laminate stock on eBay, I realized that it was designed for a heavy barrel, not the factory taper. So I decided to throw together a rifle utilizing the stock which I really bought by accident.
This initial project was based on the CST receiver with a KIDD Ultra Lightweight barrel, Timney trigger, JWH Custom bolt, and a Vortex scope. At the time, I was happy with the performance, and it looked pretty good too. It stayed in that configuration for about a year, and I had no complaints.
The Boyds At-One Adjustable stock
I’m a guy who enjoys shooting, and I share my enthusiasm with anyone who wants to get out and shoot for fun. So most of my rifles and pistols get used by different people. And everyone wanted a turn behind this rifle, since it shot much better than a stock one. But people come in different shapes and sizes, and not everyone fit the rifle. Which is why when Boyds offered their At-One adjustable stock for review, I took them up on that offer. Having the adjustable cheek rest height and length of pull allowed for better ergonomics, for adults and children. And it looked even better than the plain brown laminate (in my opinion).
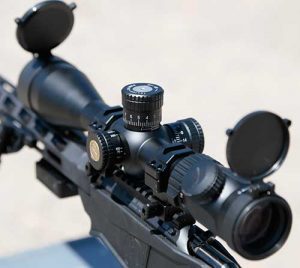
A big upgrade to the scope
While a Vortex Crossfire II 4-12×50 is a decent scope for the price, the 12x is a bit limiting when trying to shoot small targets or groups at a distance. But I had this Athlon Argos BTR GEN2 6-24×50 scope left over from my Precision Rimfire rifle. When I parted ways with the Precision Rimfire, I kept the scope. And it eventually made its way onto this rifle, as it was my nicest scope and my most accurate rifle. The Athlon definitely seemed to be a good match, and helped me quite a bit when we added a KYL (know your limits) rack to our target collection. With twice the magnification, hitting that tiny 1/4″ target was certainly a little easier. Because seeing it was half the battle.
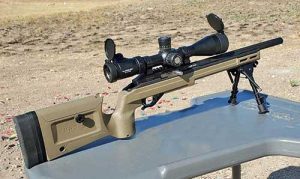
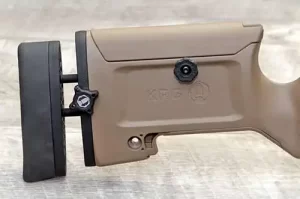
The impeccable timing of my KRG 10/22 Bravo Chassis upgrade
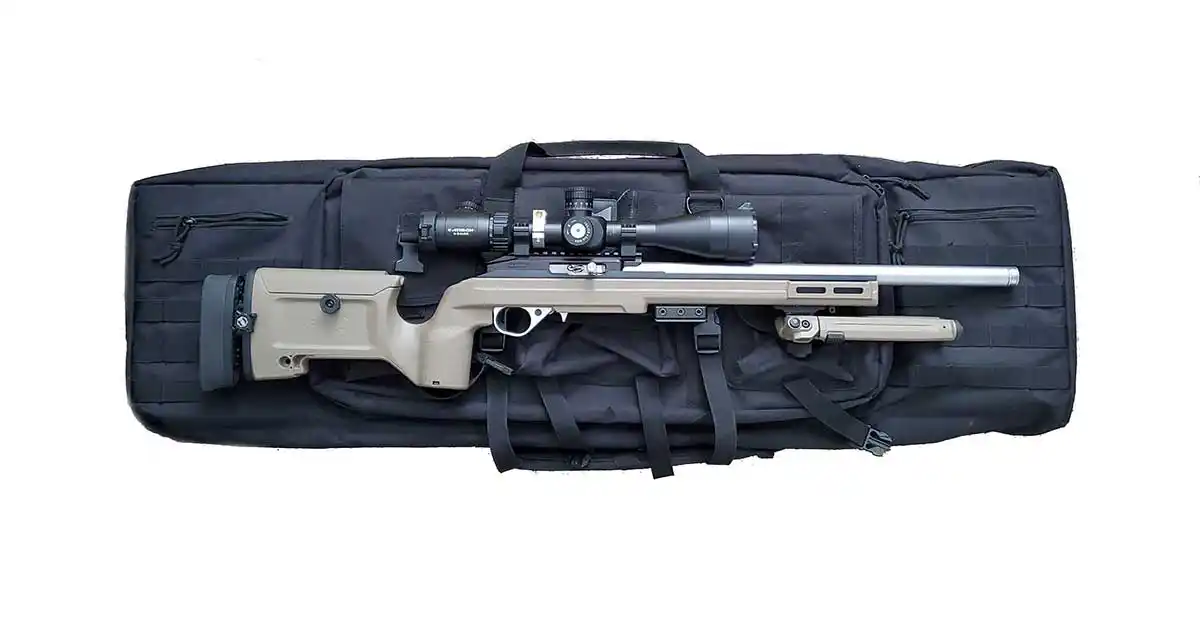
As my shooting skills improved, so did my access to better ammo. While I’m still not a fan of shooting tiny holes in paper, I’ll do it to determine accuracy potential. Then I go back to our steel targets, golf tees, crabapples, or whatever else we can find that offers some satisfying feedback with each hit. Right around the time that I got a very good deal on a KIDD two-stage trigger, KRG sent me their 10/22 Bravo Chassis for testing and evaluation. After trying two different barreled actions in it, I realized that my rifle had a bit more potential. I ended up keeping the KRG Bravo, as it’s the perfect chassis for testing everything from triggers and scopes to complete barreled actions.
Upgrading the upgrade
After some time with the KRG Bravo, I realized that I was close to having the perfect ergonomics, at least for me. While the Bravo Chassis itself was an upgrade, the KRG Rimfire Tool-Less LOP kit was the icing on this rifle cake. My rifle was now in its third stock, with its second trigger, and fit me perfectly. Sorry friends, you can shoot my new Precision Rimfire if this rifle doesn’t fit you. I’m not messing with the adjustments, because it’s like a tailored suit for me. After close to three years, this rifle is almost at peak perfection.
But wait, there’s more!
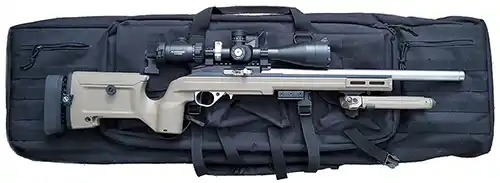
“Almost at peak perfection”. When I started this initial build, I bought that KIDD ULW barrel because it was reasonably light, and certainly more accurate than I thought I could shoot at the time. But the passage of time, along with improving my skills, has changed my mindset. Even with an “Ultra Lightweight” barrel, my rifle was no longer ideal for carrying in the field, and I felt the barrel might now be holding me back a bit. There was only one thing left to do – fully commit. That meant ordering the KIDD stainless match barrel. This 18″ barrel is a porky 3 pounds, 3 ounces. Tony Kidd guarantees it will shoot 1/2″ five-shot groups at 50 yards. My high-end plinker has now been relegated to the bench, as it weighs in at an even 10.5 pounds. But I have removed any excuses when it comes to performance. As long as I find the right ammo for it.
Topping this off, a friend was kind enough to offer me a fantastic deal on some Vortex precision-matched scope rings. They are slightly taller than the current rings, which should help when shooting prone. They have not been installed yet, but next weekend is supposed to be warm enough to shoot outdoors, so I expect that to happen during the week.
My final thoughts
For what this rifle would cost to build, I could have almost bought a complete KIDD rifle. But I would have missed out on a lot. For one, the journey was educational. My rifle evolved along with my skills. And I got to try out new bits and pieces here and there. The Timney trigger is a great upgrade over stock, but the KIDD two-stage is in a class of its own. That Boyds At-One stock offers plenty of adjustment and looks great too. The KRG just offers more adjustment, as well as options for things like an Arca rail and M-LOK mounting points. Where I thought the KIDD ULW barrel was accurate, I now expect even more from the stainless match barrel. Even the Magpul bipod, which I’ve felt was somewhat ineffective with light rimfire rifles now seems right at home.
Whether you start with a stock 10/22 or jump in with a custom build, it seems that there is always some room for improvement. It’s most interesting to me that I once thought this rifle was beyond my potential. Now, I’m much more confident in my skills and ready to wring every last drop of accuracy out of it in its current setup. If there is a lesson here, it’s that finding the right rifle to match your skills is a journey. As your skills evolve, so should your gear. It doesn’t happen overnight. Enjoy the process, learn from it, and have fun.