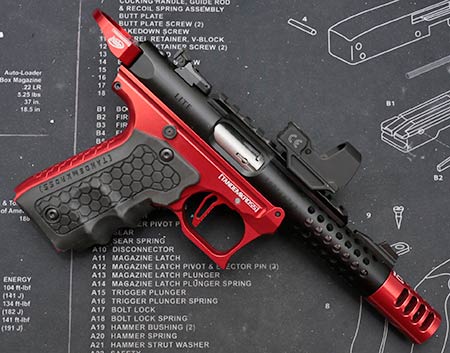
It was almost a week ago that TandemKross released their Kraken stripped lower for the Ruger Mark IV 22/45.* I wrote about it here. Well, mine arrived today, and I had the day off. So after stripping one of my pistols, I spent about an hour reassembling the parts onto the Kraken lower. Here’s a few photos, along with some thoughts on the process. Spoiler alert: It’s easier than it looks.
*Note that the Kraken is now called the Cthulhu, and it is available as both a complete Tandemized lower, or a complete “blemished” versions at a reduced price.
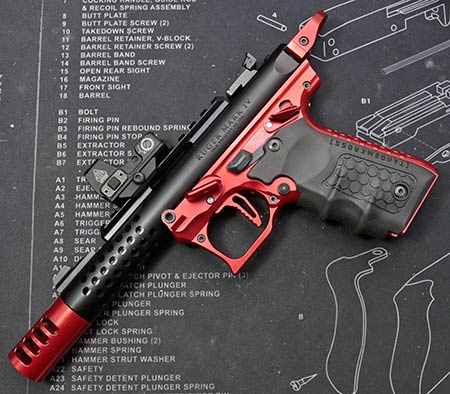
The Kraken (a quick recap)
This is the first aftermarket lower for the Ruger Mark IV 22/45 that I am aware of. It’s available in red or black, and takes all factory and nearly every aftermarket accessory. They can’t say every single aftermarket part will work, because there may be some that don’t. Unlikely, but there’s always a small concern. For what it’s worth, all my aftermarket parts fit just fine.
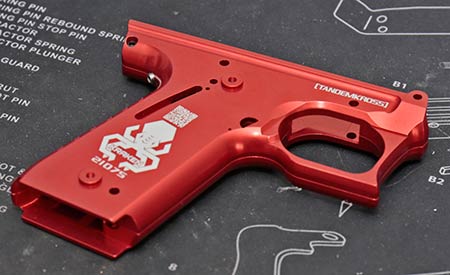
Prepping
First step is to disassemble your current lower. TandemKross offers a pretty good set of instructions for that. If you’ve already done any work on one of these, it’s a quick job. Note that a tidy work space is a must, so that no small parts or springs get away. As I took each part off, I cleaned them, and laid them out in order. If you happen to have sourced all the parts separately, then you could skip this step. To that end, I’m already dreading the call to Ruger to get prices, and that will be a separate article for anyone who doesn’t already have a complete lower to use as a donor.
Assembly
It helps to read all the way through the instructions once or twice. I also borrowed my wife’s tablet so that I could scroll through at my bench. Each step was clear, and easy to follow. Where I got tripped up a few times was the very first step – installing the frame lug and lug screw. I have the Striplin Custom Gunworks forward thumb ledge (gas pedal). This part has the lug screw. but is also the pin for the trigger. So I had to take a step back when it was time to install the trigger and the rest of the parts in the front of the upper. Installing the sear, easily the worst part previously, was actually easier. TandemKross added an extra hole to the lower, and one of the included hex keys fits through it, holding the sear in place. Guiding the spring in was the hardest part, and even that was easy.
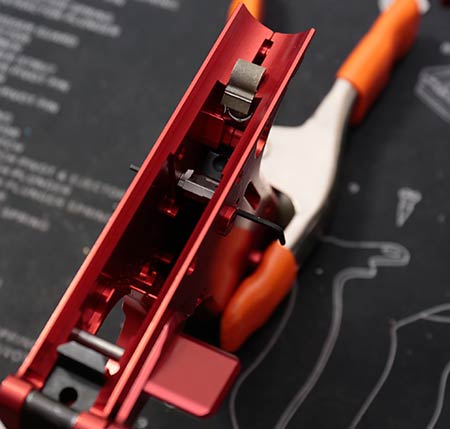
Everything else went very smoothly, thanks to the excellent instructions. It was actually quite simple, compared to working on the factory lower. Part of that is familiarity, because I have done plenty of work on my other pistols. Between the hole for the sear, and using the TandemKross Blast Shield in place of the old disconnect, there was nothing frustrating. Magazine release test passed. Safety passed. Trigger reset? Failed. I knew it would, and it was obvious why. My Victory trigger has set screws for pre-travel and over-travel. With the new lower, the pre-travel screw had to be backed out a bit for the trigger to reset. Once that was done, it functioned as expected.
Ergonomics
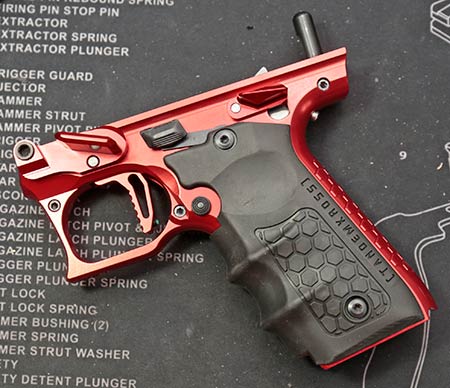
Once it was all back together, I compared it to a more “stock” 22/45. The biggest difference is probably the trigger guard. Although it looks like it’s undercut a bit, it’s not really. The trigger guard is actually a bit bigger, and hangs down more. This is great for gloves, or those of us with big hands/sausage fingers. Even better, that hook on the front gives me a place to rest my support hand’s pointer finger. This in turn allows for a much more solid hold. While recoil isn’t a concern, I feel like this should allow a more consistent grip, making it easier and faster to move from target to target. Overall, it just feels a lot better in hand, part of which may be due to added weight making it better balanced as well.
Critical observations
Some people have already mentioned the loss of the one button takedown. To me, this is a non-issue. It’s maybe a full turn or two of the set screw to lock the upper in tight. And an equal amount to remove it. That’s no deal-breaker for me, as it still beats the older versions when it comes to field stripping. It’s also two machined pieces held together with some screws. That also doesn’t bother me, as I don’t think it could be machined as a single piece, and be affordable. I’m neutral on the new backstrap texturing. It’s not very aggressive, but it’s also not objectionable. What I would like to see is some checkering or something similar on the front of the trigger guard. In my opinion, that would be improved by adding a little traction. Other than that, I have no concerns, as it appears that plenty of time was spent working through the overall design.
Wrap up
If you were expecting detailed assembly instructions, I’ll apologize now. TandemKross already provides them, and I see no reason to reinvent the wheel. As far as prices for building up the Kraken without a donor, that will need to wait too. Heck, I don’t even have a range report yet. But going in, I knew this would take a few installments to cover everything. What I wanted to do was share how easily it is to assemble if you already have a donor (and $319.99 for the black Kraken, or $329.99 for a red one). I’ll get to the range and give it a good workout. And I’ll see about prices for building one. As I mentioned last week, I already have most of the required factory parts after doing a few upgrades. So I’ll need to see what’s left to put my old lower back together. Stay tuned.
I’d like to thank TandemKross for sending me their Kraken stripped lower for testing and evaluation. It’s great to see them innovate, and bring to market something that we’ve been asking for. For anyone building a custom Ruger Mark IV 22/45, this is a great foundation. And for those that upgraded their barrel (upper), and have a spare lying around, this is a way to push that upgrade even further, and maybe end up with a second pistol. Check out TandemKross.com for the Kraken, as well as plenty of other upgrades for a variety of recreational and competitive firearms.