If you want to customize your Ruger MK pistol, TandemKross should be your go-to. They have just about anything you could want to make it more reliable and/or accurate. Whether you are a plinker or competitor, they’ll help you make your good gun great. Which is why I’ve been so excited to be a part of their affiliate program. I’d been using some of their products already, and now I get to try out more of their line, and share the results with our readers.
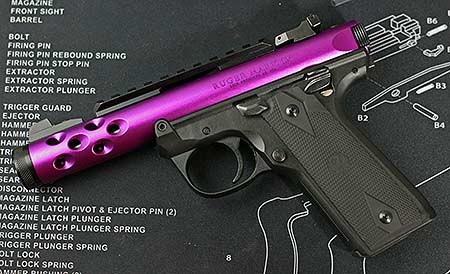
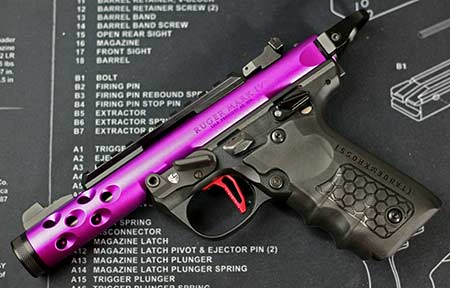
As part of our commitment to promoting recreational shooting as a family sport, I recently made a few changes to my collection. Between my wife, daughter, and myself, we all had different rimfire rifles and pistols. I felt it best if we all started with the same platform, so I bought some new pistols. I already had the Ruger MK IV 22/45 with the heavy barrel, and added a pair of Lite models. One is black, the other purple. After some discussion with TandemKross, a box of goodies was on its way. First to be modified was my wife’s purple Lite. Here’s how we set her up.
TandemKross Victory Trigger
A good competition trigger has minimal pre-travel, and a short reset. Although you could replace the entire fire control group, I don’t think that’s usually necessary. The Victory trigger is pretty much a drop-in part, and with it, you can adjust pre-travel and over-travel. Plus, the flat face lowers perceived pull weight. When speed and accuracy are the goals, I really like these flat triggers. One concern was the sharp edges. But if your finger is contacting the trigger correctly, it’s not an issue.
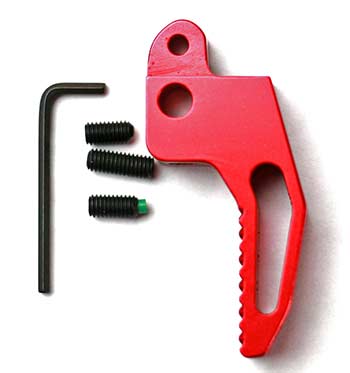
How hard is it to install the trigger? In the video below, you’ll see two kids walking you through it. Granted, they may have done it once or twice already. But it really is a simple task, and the video makes it super easy. If you’re all thumbs when it comes to mechanical things, enlist a friend, or pay a gunsmith. Otherwise, I highly recommend you do your own work. Not only does it give you a sense of satisfaction, it saves you money. More importantly, with each job, you learn a bit more about the function of your firearm. That in itself is priceless. By the way, three screws are shown, but only two are used, depending on your model of pistol. MSRP for the TandemKross Victory trigger is $49.99, making it an excellent value.
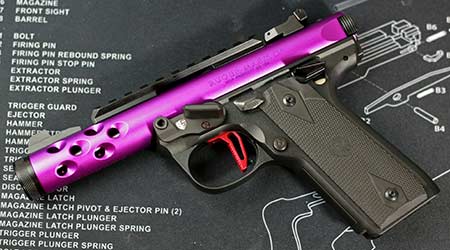
Once installed, expect to spend a bit of time adjusting the two screws. Time spent adjusting them is time well spent. Due to tolerances in the grip frame, you can’t get all the pre-travel and extra play out. It still feels a tiny bit wiggly, although the takeup is much better. Try to take out too much pre-travel, and it may have trouble resetting. I ended up backing the overtravel screw out maybe 1/4 turn from full contact. It’s just enough to make sure it can break fully, without coming up short. Once I found the sweet spot for both ends of travel, it’s really an improvement over the factory trigger shoe.
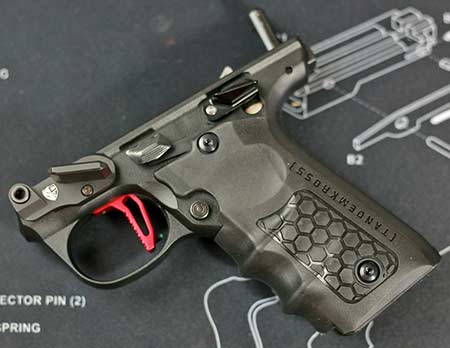
TandemKross Thumb Ledge Combo
This combination includes the Cornerstone Safety Thumb Ledge, and the Striplin Custom Guns Thumb Rest. The Cornerstone is an oversized safety, ideal as a thumb rest. Not only does it help with a consistent grip, it prevents you from accidentally engaging the safety. Up front, the Striplin Thumb Rest is a “gas pedal” type thumb rest. Together, they get both thumbs pointed forward, for a secure and consistent grip. I’d been using a similar setup on my CZ competition 9mm, and it really does improve speed and accuracy.
Now, installing these two is easy enough, but you’ll want to watch the video a few times for the safety. The Striplin Thumb Rest is a simple task, as you’re replacing a screw with the rest, and longer hardware. Another 5 minute job. For the safety, you’ll want to follow the directions carefully. It’s easy to mess up, resulting in a good portion of your fire control group falling out. Not to worry though. The second half of the video shows how to put it all back together, just in case. This takes a patient 10 minutes or so, unless you make a mistake like I did. Then it’s more like 30 minutes. Be sure to triple check all functions after reassembly.
Pricing for the Striplin Custom Guns Thumb Rest is $55.99 in matte black or red. For the Cornerstone Safety Thumb Ledge, it’s $59.99 but in a more gloss black or red. At the time of this writing, the combo was $99.99, which is a savings of $15.99 over the separate prices. If you’re serious about your shooting, it’s well worth it. You can shoot “thumbs forward” without either, but you won’t have that solid, consistent grip. Note that they are made by different companies, so the color match isn’t perfect. Certainly close enough that it doesn’t bother me.
TandemKross hiveGrip
On the 22/45, the factory grips could be described as “not bad”. But when has that ever been good enough? The hiveGrip is a one-piece, wraparound rubber grip. It’s got just the right amount of texturing. Finger grooves are usually a “love ’em or hate ’em” proposition. I love them on these grips. The placement and spacing is just right. They’re pretty slim, but I think they are better suited to larger hands, rather than smaller.
Installation is as easy as removing four screws, taking off the old grips, and installing the new ones. Be sure not to overtighten. Once installed, it’s easy to appreciate the extra grip and comfort. A nice touch is the thumb relief – if you’re not using the oversized safety, this aids in keeping your thumb pointed forward, rather than splayed out. MSRP is $39.99, and installation takes maybe 5 minutes. Take care when threading the steel screws back into the brass inserts.
For me, these grips check all the boxes. Rubber, grippy, and finger grooves work well for me. But there are some things to be aware of if you have smaller hands. Stock grip panels leave you with a grip about 1.14″ wide. The hiveGrip is around 1.30″ inches wide, and a bit wider on the high spots of the finger grooves. At the same time, the wraparound design makes the grip longer, front to back. Not an issue for me, but I’m going to post an update after my wife and daughter have thoroughly compared them to the stock grips. This grip is also available on Amazon!
TandemKross halo Charging Ring
Anyone who’s ever fired a Ruger Mark series pistol knows that racking the slide gets old quickly. I’ve been pinched once or twice, but it’s just not ideal to grab that narrow bolt. My wife has had several hand and wrist surgeries, making it a bit difficult for her. It’s not that she can’t, it’s that it’s not as easy or comfortable as it should be. Same with some of the younger shooters we’ve spent time with. So the halo is the perfect solution. It’s light, installs easily, and can be used with one finger from either hand.
This is one of the easiest parts to install. After clearing your firearm, lock the bolt back. Position the halo at 45 degrees to the final position, then rotate it into place. Make sure the curved side is on the bottom. Put a dab of blue Loctite on the set screw, and tighten it down, but not too much. It’s that simple. Black and silver versions are $49.99, red and Besty Ross (limited edition) are $59.99. Personally, I like the plain black.
Honestly, I didn’t think I was going to like the halo very much. Turns out it’s one of the best purchases I’ve made for these pistols. And it’s also made it so much easier on my wife. This is one of my “must-have” parts going forward.
End results
Although I usually prefer matte black for firearms, this is my wife’s, so a few pops of color are fine. More importantly, though, is function. We started with a pistol that worked just fine. Now, it’s better in nearly every way. She can charge it faster and easier. Her grip is better, and more consistent. It’s much easier to get off faster strings with less effort. And yeah, it does look good. Total cost was about $240, on top of the cost of the pistol. You may not want the exact same setup, and you don’t need to buy everything at once. But if you do, TandemKross has these parts, and more.
My daughter’s pistol is next. We’ll be using some of the same parts, as well as some different ones. When it warms up, we’ll ditch the indoor range and paper targets for outdoors and steel. In the meantime, if you have any questions or comments, feel free to share them below.
*Some of the items in this article were provided by TANDEMKROSS for testing and review. The halo was a separate purchase.